If you’ve read the first post in this series or are playing along yourself, you’ll be aware of the 52 Week Ham Radio Challenge. If not, hit up that link for the details!
This post covers the challenges from weeks 33-36, which were:
- Build an antenna and make a contact with it.
- Match an impedance!
- Receive a weather fax transmission on HF
- Operate your whole station from battery power for one day
Week 33 (11-17 Aug): Build an antenna and make a contact with it.
My first few X6100 activations with my end-fed random wire antenna—both with and without coax and an unun—were slow and dogged with reports of poor audio. By contrast, my first use of the X6100 with the “big” dipole from the QRO kit was a great success. I decided that I wanted a dipole antenna for the lightweight QRP kit, and what better opportunity than this challenge to make one?
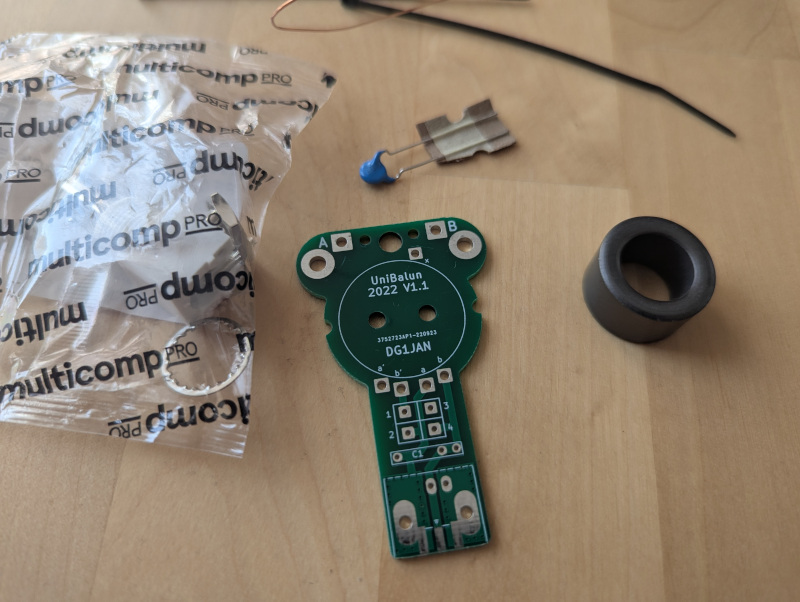
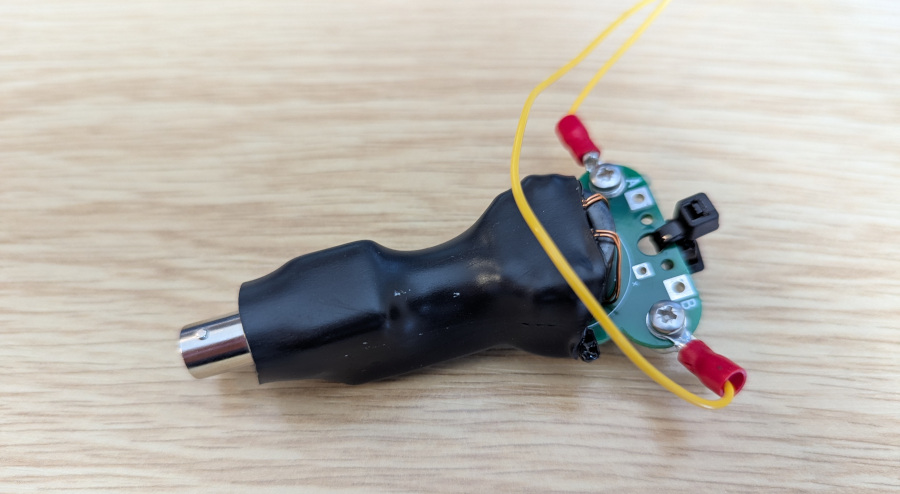
For a while, I’d had my eye on the UniBalun kit by DG1JAN, thinking it would make a great centre for a variety of QRP dipoles that I could build. At £6.49 for a complete kit, how could I go wrong?
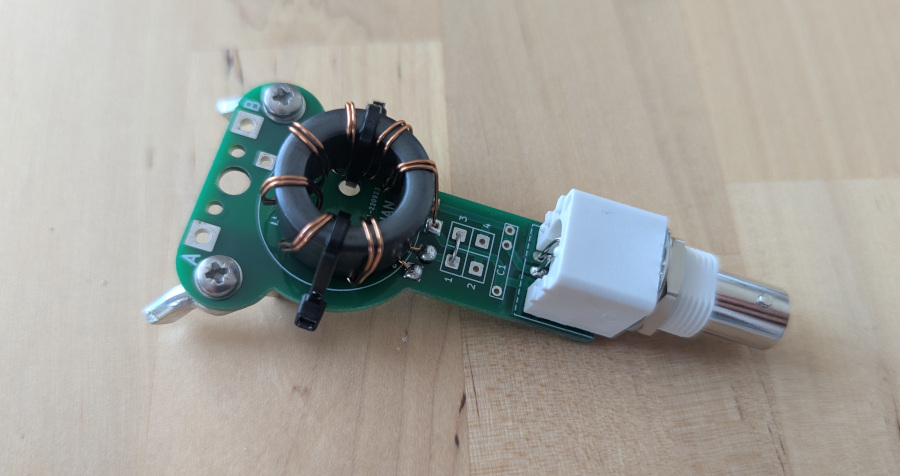
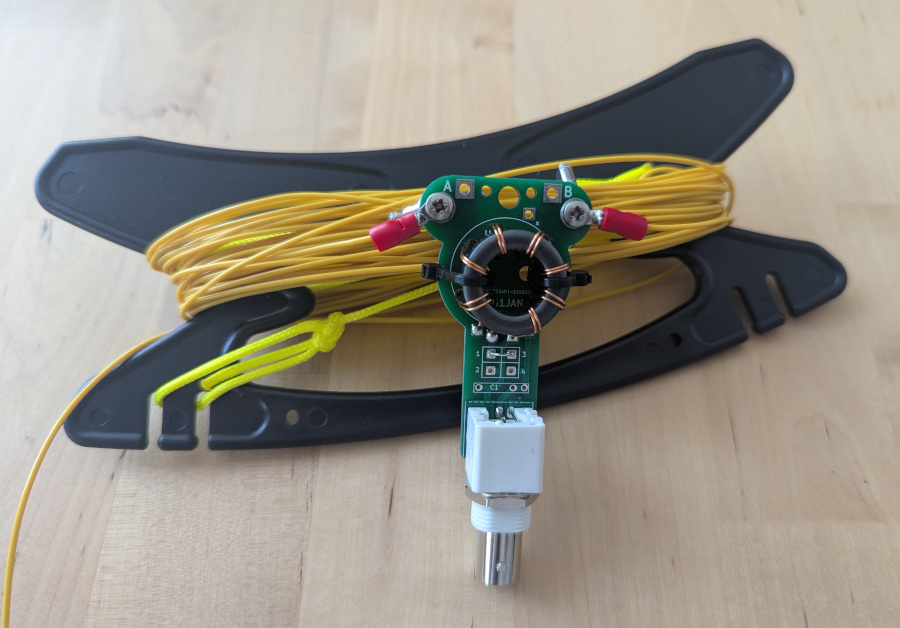
To go with the balun, I also bought some thin wire and rope to peg out the ends of the antenna. I chose to attach the wire to the balun with bolts and wing nuts for easy replacement, either for repair or to switch bands, though at the price of these kits I might as well just buy another for each antenna I decide to make. A also picked up one of Sotabeams’ smaller winders, which would fit in my small radio bag better than the previous larger winder.
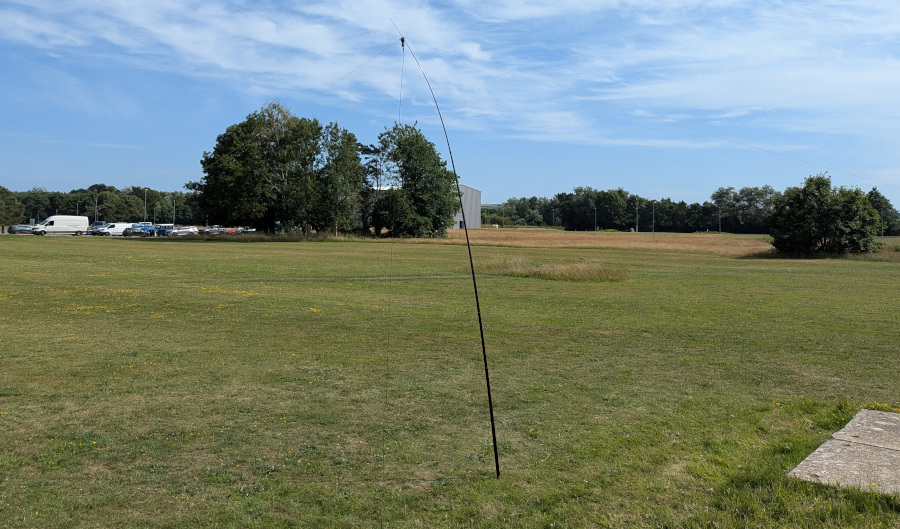
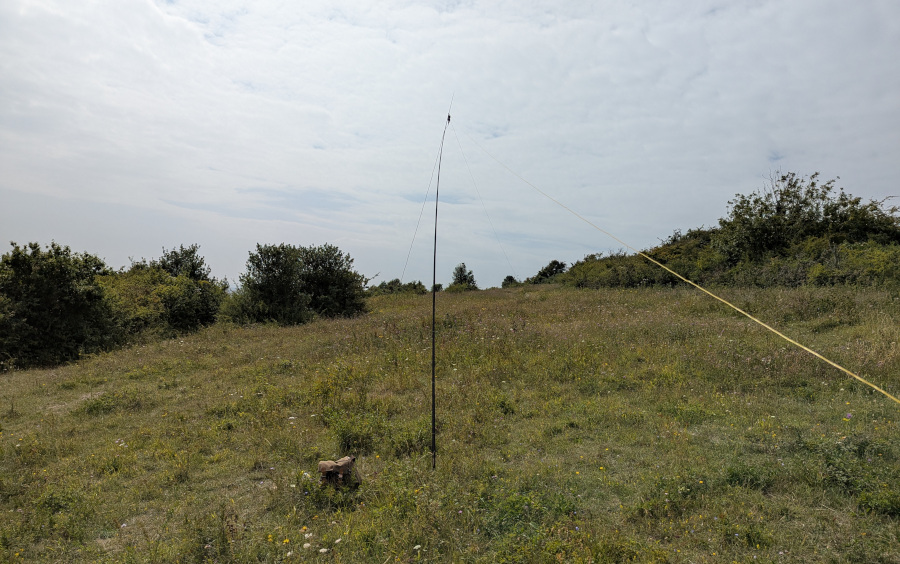
I set up the antenna in some open space, and with the help of friends, tuned it to resonance around 7150kHz, achieving an SWR around 1.2:1. With the mid-point of the inverted V only 4m above ground on my small pole and the dipole ends less than 50cm above the ground, I’m sure the beam pattern is strongly upwards, but that was my goal for this antenna anyway—with only 10W SSB out of the radio, I wouldn’t be DXing anyway, so I focussed on NVIS use.
I did learn an important lesson for future tuning, which is that folding the end of the antenna back has some effect, but not nearly as much as cutting the end off. In this case I had quite a lot of wire folded back before I decided to start cutting, and nearly overshot the 40m band cutting it too short. So, fold back, test, cut, and test again before repeating the process a few more times on your way towards the resonant frequency you’re after.
After confirming the resonant frequency and SWR with a NanoVNA, I conducted a couple of test transmissions to prove the antenna was functional, then applied some heat-shrink to improve the ruggedness of the balun.
All that was left was to make a QSO to complete the challenge. Here I have to reveal that I did this challenge week somewhat ahead of schedule, because my first QSO with this antenna was on Friday 25th July. I took it out as part of my QRP kit while travelling, and found the time to hit up a POTA spot on the way home.
The first QSO was with fellow POTA activator Jean Baptiste F4ILH, in south-west France at a distance of just under 600km. I was transmitting SSB at 10W from the X6100, and received a 55 report.
I grabbed another 10 QSOs over the course of an hour to complete the POTA activation, but sadly didn’t make it to 25 for the bunker. Inter-G conditions were pretty bad on 40m and the band was quite noisy. On the plus side, I had no reports of poor audio, so I think I’ve finally found an antenna setup for the X6100 that I’m happy with!
Week 34 (18-24 Aug): Match an impedance!
This week’s task was to use an online tool incorporating a Smith chart to develop an antenna tuning circuit, for an antenna with an impedance of 36 Ohms at 7MHz.
I used https://onlinesmithchart.com/ to play around, and I think I may have succeeded? I’d be lying if I said I really understood Smith charts, and despite being three exams deep into the hobby my understanding of antenna matching is limited to a few basic circuit types and the concept of just trying different inductances and capacitances until you find one that works.

While the real meanings of the various lines on a Smith chart still refuse to stick in my brain, it’s nice to see that changing the L and C values move the “result” in slightly different directions, and therefore to get the right position on the centre line you do have to adjust one every time you adjust the other—much like you do with a manual tuner.
I seem to have done the job with a 4nF capacitor in series and then a 1uH inductor to ground, giving a result of 49.22 Ohms at 7MHz, and a resulting SWR of 1.37.
Week 35 (25-31 Aug): Receive a weather fax transmission on HF
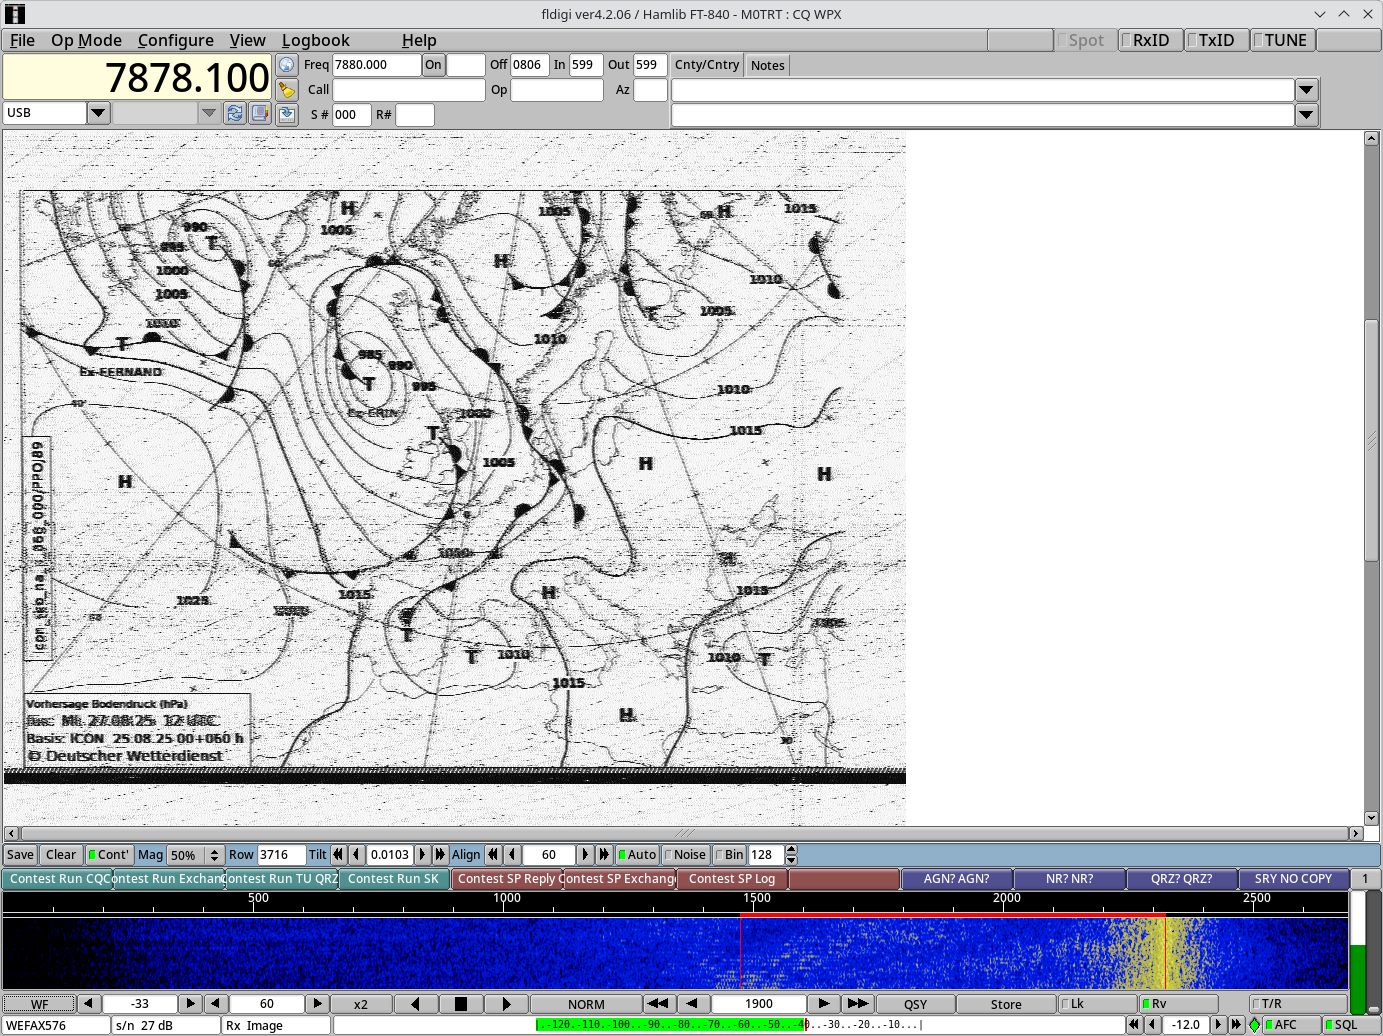
I took advantage of some free time on Bank Holiday Monday to set this one up. It was relatively easy to achieve, since week 20 taught me about the DWD HF weather services, and having set up fldigi back then to receive the RTTY broadcast, it was also a simple matter to use the same software to receive the weather fax broadcast.
The OARC Wiki has a page on setting up fldigi to decode the signal—it also contains instructions for using an SDR as the receiver and a virtual audio port, but I used my FT-840 and Signalink instead. As instructed, I set fldigi to Wefax mode and set the frequency shift to 850, then let it run. After a couple of tweaks to the tilt and alignment values underneath the images, I was happily tracking the path of ex-hurricane Erin across the north of the UK. On the south coast we have had beautiful sunny weather and almost no rain for a month now, but it looks like that all changes on Wednesday, and summer will begin its long fade into autumn.
Week 36 (1-7 Sep): Operate your whole station from battery power for one day
I jumped ahead a little for this one, and actually did it on the same day as I was receiving the weather fax transmissions for the previous challenge week.
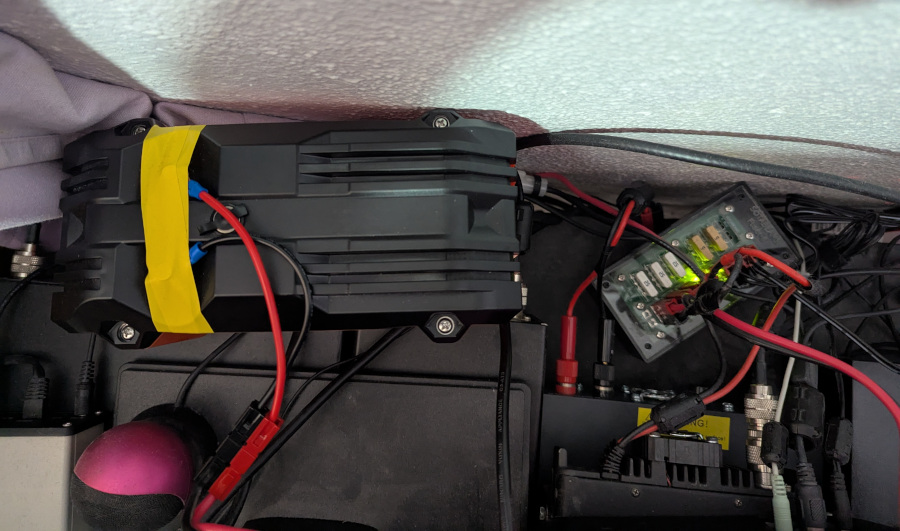
Well, my usual station is out in a field somewhere and my shack is the “great blue sky shack” as they call it, so honestly I’ve probably spent more time on the radio on battery power than I have on mains power. My go-to battery for QRO portable operation is this 20Ah beast, which allows me to go for hours at 100W Tx power, to the extent that I don’t always even bother recharging it between activations. It successfully keeps the Scouts going for a full weekend of JOTA too, which was the main reason I bought it.
I standardised all my 12V DC connectors on PowerPoles last year, and bought a fused distribution box from Sotabeams for the home shack to tidy everything up behind the scenes. A little on the expensive side for a simple PCB and a box, but time is money and knew if I DIYed it, it would become another unfinished project! This forms the main 12V DC bus that runs behind my radios and computer monitors, powering the FT-840 HF rig, FT-7800 VHF/UHF rig, the Plane/Sailing hardware with its 3 Pi Zeros & SDRs, and my DV hotspot. Normally this is powered with a 23A desktop power supply, but for this challenge it was a simple matter to unplug that and plug in the 20Ah battery.
Job done. Even if I decide to spend all day calling CQ from home—a very rare occurrence—this should last the day and probably tomorrow too.
That’s all for this round-up, see you in early October for the results of weeks 37 to 40!
Comments