It’s a little over a month until we are getting our first pet - a crested gecko. In the mean time, we are getting our vivarium set up ready for our pet. We have just about everything we need, but managing the environment is a manual process — turning the lights on in the morning and off in the evening; maintaining heat and humidity.
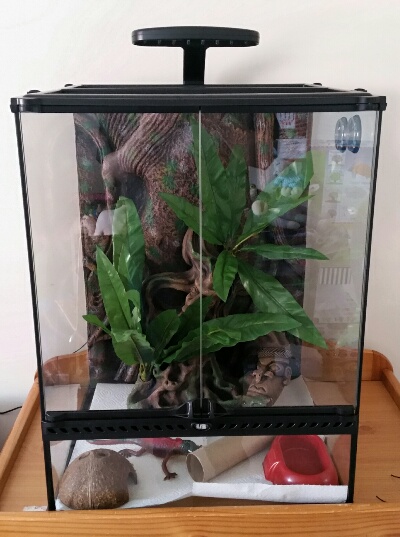
Vivarium shown here with simulated occupant.
This is crying out to be an electronics project, so I’m going to make it one! In this post I’ve laid out my initial requirements and listed some suggested components. I’ll probably do one or two more covering the actual hardware build and software when the components arrive.
Requirements
My requirements for the automated vivarium system are that it must:
- Automatically turn the 12V DC LED light panel on and off at a defined schedule
- Monitor temperature and humidity inside the vivarium
- Automatically control the 240V AC 10W heat mat to keep the temperature within defined bounds
- Send email alerts if temperature and humidity exceed the defined bounds
- Take regular photos of the inside of the vivarium
- Regularly post photo, temperature, humidity and status information to another computer for display on a website
- Fit in a 450x80mm space next to the vivarium (except components that must go inside)
- Be powered from a household 240V AC supply
- Not expose 240V AC to the probing fingers of children.
Initial Design
The requirements to operate the lights at specific times of day (requiring a proper clock), to send emails, to use a camera and to send files to a computer all push the design towards one including a “proper” small form factor computer rather than a basic microcontroller. Due to my familiarity with the hardware I have chosen a Raspberry Pi for this system. The Model A should be sufficient for the system’s limited requirements.
The Raspberry Pi’s official camera modules are easy to use and have good performance due to dedicated processing on the Pi’s GPU. I have chosen the “NoIR” camera, which lacks the IR filter of the standard camera, to improve visibility of the gecko at night. No IR illuminator is proposed as this may interfere with the lizard’s sense of time or temperature regulation.
The proposed AM2315 thermometer and hygrometer module is comparatively expensive, but comes inside a tough enclosure with a wall mount and uses the standard I2C protocol, compared to the proprietary bit-banging protocols of the cheap sensors.
Relays will be used to switch the lights and heat mat power on and off. A breadboard will be mounted to a Raspberry Pi case to keep the hardware neat while allowing for easy extension in future.
Component List
Here’s my list of the components, along with links to buy them. All but one are available on Amazon in the UK; the thermometer/hygrometer seems to be an Adafruit special and will have to be imported from the US.
| Component | Choice | Price / GBP | Link |
|---|---|---|---|
| Computer | Raspberry Pi Model A+ | 18.00 | Amazon UK |
| Wifi Dongle | Ralink RT5370 | 4.71 | Amazon UK |
| GPIO Breakout | Pi Cobbler | 10.00 | Amazon UK |
| SD Card | Kingston 8GB | 4.00 | Amazon UK |
| Breadboard | BB400 | 1.15 | Amazon UK |
| Jumpers | Generic | 1.07 | Amazon UK |
| Power Supply | Generic | 6.00 | Amazon UK |
| Case | Model A Case | 4.49 | Amazon UK |
| Temp/Humid Sensorr | AM2315 | 19.97 | Adafruit |
| Camera | Raspberry Pi NoIR | 19.13 | Amazon UK |
| Suction cups | Generic | 3.57 | Amazon UK |
| Relay Board | Facilla 2-channel | 1.13 | Amazon UK |
| Enclosure for mains relay | Generic black ABS 150x80x50 | 5.90 | Amazon UK |
| Enclosure glands | Generic M12x1.5 | 1.59 | Amazon UK |
| Total: | 100.71 |
Stay tuned for build photos, schematics and source code once all the components arrive!
Update: It turns out the heat mat was bought with its own dedicated thermostat. With this in mind I’ve decided to ditch the timed control of the lights and use a standard mains plug timer instead. This will be easier for people to override if necessary, rather than depending on whatever software interface I provide.
Since the system is therefore not controlling anything I can ditch the relay board and the requirement to use a proper glanded enclosure to protect the 240V AC switching relay. It will still take photos, monitor temperature and humidity, display them on the web, and email on important events.
Add a Comment