Last time around, we fired the tank up, gave it a test run and shot just about everything in the office that was unfortunate enough to be within a foot of the floor (legs included). Which is great if you like radio control tanks (and who doesn’t?), but today on the Raspberry Tank build diary, it’s time to break it completely.
Yep, we can’t put anything inside without opening it up, so today’s job is disassembling the tank – which as you might gather by the size of your scrollbar, is not an easy job.
For reference, this is a Heng Long 1:16 scale Tiger I tank, with the “Smoke & Sound” kit plus metal tracks and a metal gearbox (doubtless installed by someone with greater skill than I).
Step 1: Preventing Catastrophe!
Firstly and most importantly, that little flap on top that holds the BB pellets in is not going to do its job when the tank is upside-down! Blu-tack saved the day, preventing a massive cleanup operation. With the hatch secured (or the tank empty of BBs), the tank was turned over.
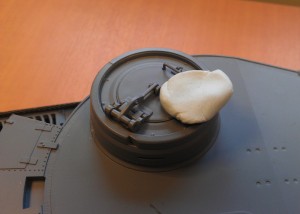
BB Hopper sealed (with Blu-tack)
Step 2: Removing the Tracks
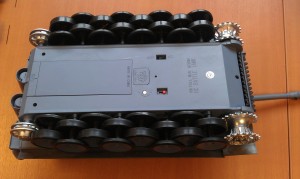
There were a total of eleven screws holding the top and bottom of the tank together. Three were easily accessible, so those were removed first:
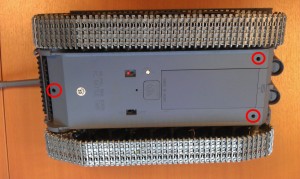
Underside of tank (screw holes highlighted)
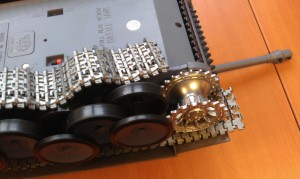
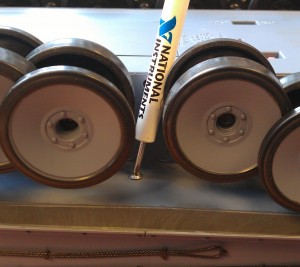
The other are were more complicated to get to, as they are behind the tracks. Firstly, the tracks themselves had to be removed. Each track segment is attached to its neighbours by a pin much like those used in watch straps. To remove a pin (any one is fine), you start by pushing it from the outside of the tank towards the middle with a thin object as shown below. It would be irresponsible of me to recommend using oscilloscope probes for this task, of course. whistles
Once the pin was pushed out by a few millimetres, the other side could be grabbed with a pair of pliers, and pulled. The pin came out pretty easily, leaving a track that is no longer a loop and could be slid out forwards or backwards. This was repeated for the other track.
Several pins seemed quite resistant to being pushed, but there was some variation and eventually I found ones that would give. You do need to push pretty hard with your scope probe small screwdriver, though, so if in doubt push harder!
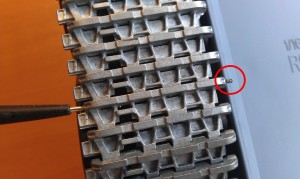
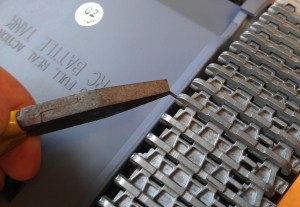
Pushing from the outside (left) and pulling from the inside (right)
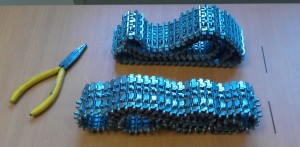
At the end of that operation, we now had one trackless tank and one pile of tracks (shown next to the pins that were removed:
Step 3: Moving the Wheels
Once the tracks were out of the way, the eight screw-holes were visible behind the wheels.
For some of these screws, there was now a decent “angle of attack” that a screwdriver could fit into, but some were resolutely hiding behind the wheels. Luckily, only one wheel on each side needed fully removing, as taking one off allowed the others space to move.
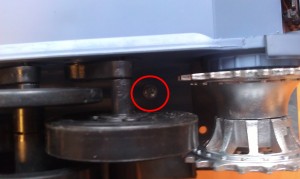
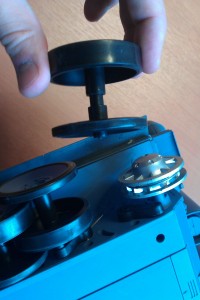
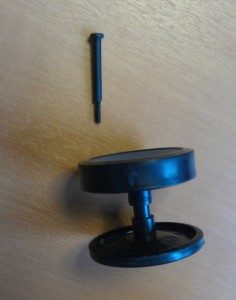
The wheels on this tank have a spring-loaded suspension mechanism that allows them to move up and down when going over rough terrain. Each wheel has a bolt going through the centre that not only holds the wheel onto the tank but also engages with the spring. The second photo below shows the suspension mechanism with a wheel removed. The “axle” bolt goes through the wheel, through the spring-loaded plastic piece (B) and into the retaining hole (A).
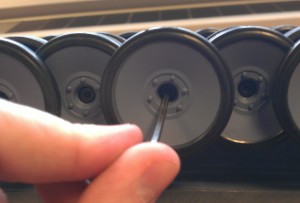
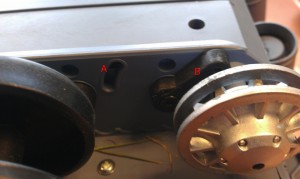
Using a hex key to remove or loosen wheels (left) and detail of the suspension mechanism (right)
We started with the wheel nearest the rear of the tank, and removed it completely using a 3/32-inch hex key.
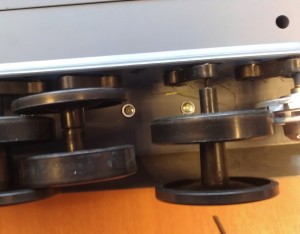
This left the gap that allowed the photographing of the suspension mechanism, above. To gain access to the rest of the screws, around half the remaining wheels had to be moved out of the way (but not removed completely). This was achieved by unscrewing each wheel so that it was no longer retained in hole A, but still attached to the spring-loaded part B. (Naturally, as it is still spring-loaded but no longer retained, the wheel will then try to pop up. This is fine, and it stays attached to B. The left-hand photo shows one wheel (left) in the normal position, and one (right) in the “popped up” position.)
The non-retained wheels can then be moved backwards and forwards as necessary to gain access to all the screws.
Step 4: Separating the Chassis
The top and bottom parts of the tank chassis could then be separated, although several connections remained inside.
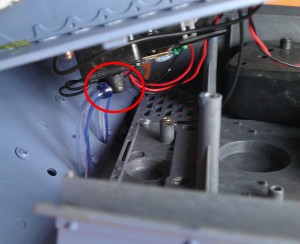
The first of these was the “smoker” that burns paraffin to make smoke as the tank drives. The fuel is inserted into the tank through tubes in the top half of the chassis, and flows into the smoker unit that is attached to the bottom. (In fact the fuel tubes are attached to the rear of the tank which is a chassis panel separate from top and bottom. In this deconstruction it seemed easier to leave the top and rear connected, and disconnect the fuel tubes at the smoker end.)
The smoker tubes were removed (highlighted in the following photo). This photo is a little odd in its perspective – the tank is still upside-down here.
Disconnecting these tubes allowed the top and bottom to separate further, which allowed access to the electronics. As the bottom half of the tank is heavier and more robust than the top half, we chose to turn the tank back upright at this point.
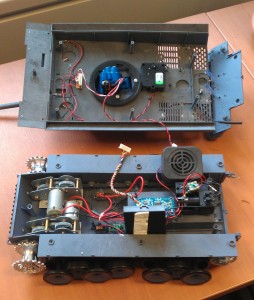
There are three electrical connections between the top and bottom of the chassis: the turret control cable (A), the BB firing trigger (B), and the aerial (C). These are highlighted in the photo below.
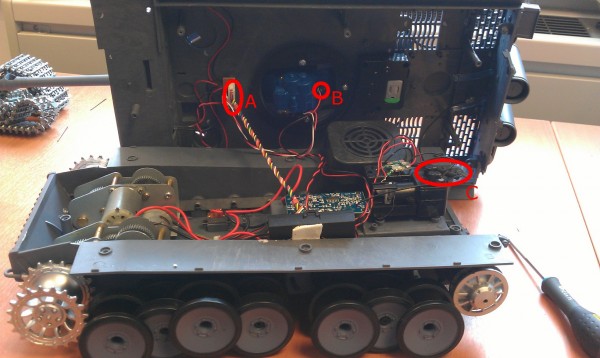
Electrical Connections between Top and Bottom
These cables were disconnected. A, the turret control cable, was unplugged at the point highlighted. B, the BB firing trigger, was soldered in place at the highlighted end, so it was instead unplugged at the RX-18 main controller board at the other end of the red and black wires. C, the aerial, was loosely connected by ferrules under the dodgy Raychem job highlighted in the photo. This was pulled apart so easily that I’m not convinced it was ever properly connected.
With these disconnections complete, the top and bottom halves of the tank were then completely separated. This is handy, as almost all the modification work to integrate the Raspberry Pi will require only the bottom half.
Step 5: Removing Unneeded Stuff
A “smoke and sound” capable tank may be great fun, but the smoker and the speaker take up a lot of space inside the tank that could be required for the Raspberry Pi. (I’ll try to fit them back in at the end of the build.) Both these devices were removed.
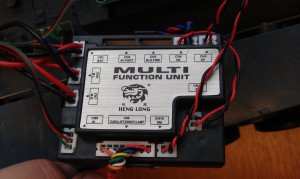
Firstly, they were disconnected from the RX-18 main board (ports CN5 and CN10).
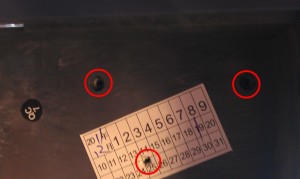
Then the devices themselves were removed. The speaker was not attached to anything and was easily removed. The smoker was attached to the base by three screws that come through from inside the tank’s battery compartment – one of which was hidden under a sticker. The photo below shows the inside of the battery compartment, viewed from below, highlighting the screw holes.
The smoker required some coercing to lift even with the screws gone.
Step 6: Recap
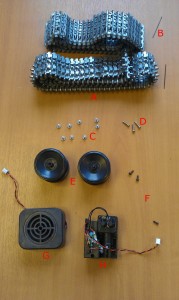
At the end of the disassembly phase, the tank and the pile of removed bits looked like this:
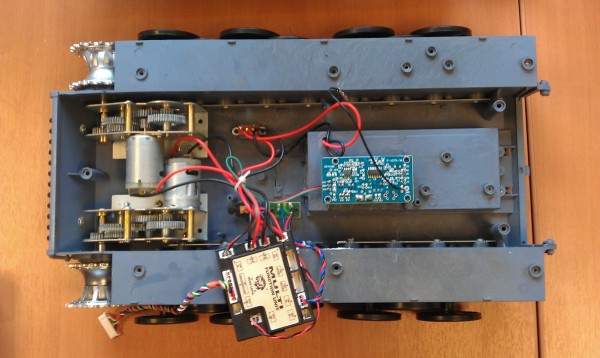
Lower chassis of tank after disassembly
The removed pieces are as follows:
- A: Tracks
- B: Track pins
- C: Chassis screws from under tracks (x8)
- D: Chassis screws from main body (x3)
- E: Wheels (x2, with bolts still inside)
- F: Smoker screws (x3)
- G: Speaker
- H: Smoker
With all the extra components removed, we were left with a lower chassis that is still capable of receiving an RF signal from the controller, and driving both drive wheels (though without the tracks, of course, it doesn’t go anywhere). Here it is doing its thing:
This setup is ideal for the next day’s activity: figuring out where we can break into the system and install the Raspberry Pi as the source of control. Will bits be banged? Will I throw my oscilloscope through the window in a fit of rage? Find out next time!
Credit where it’s Due
Disassembling the tank would have been a whole lot more difficult without the previous efforts of HoverBovver on the RCGroups forum. (Note that his/her tank is not identical to the one used here, as that post is about a non-Smoke & Sound tank, and also has a different procedure for removing the wheels.)
Add a Comment