On day 21 of the build diary, I put up a list of things to do that would turn this now remote-controlled tank into a fully autonomous one. The first software task was to replace the Raspbian operating system on my Raspberry Pi with Adafruit’s Occidentalis, an almost identical OS that also includes pre-built kernel drivers for I2C.
Installing Occidentalis
Installing Occidentalis was very easy indeed – identical to installing Raspbian, as you might expect. Day 19 covered the move from the original Raspberry Pi software to Debian, and the same procedure was followed this time to move from Raspbian to Occidentalis.
As before, Raspbian’s raspi-config utility popped up on first run, offering the ability to expand the image to fill the SD card, enable ssh, and so on.
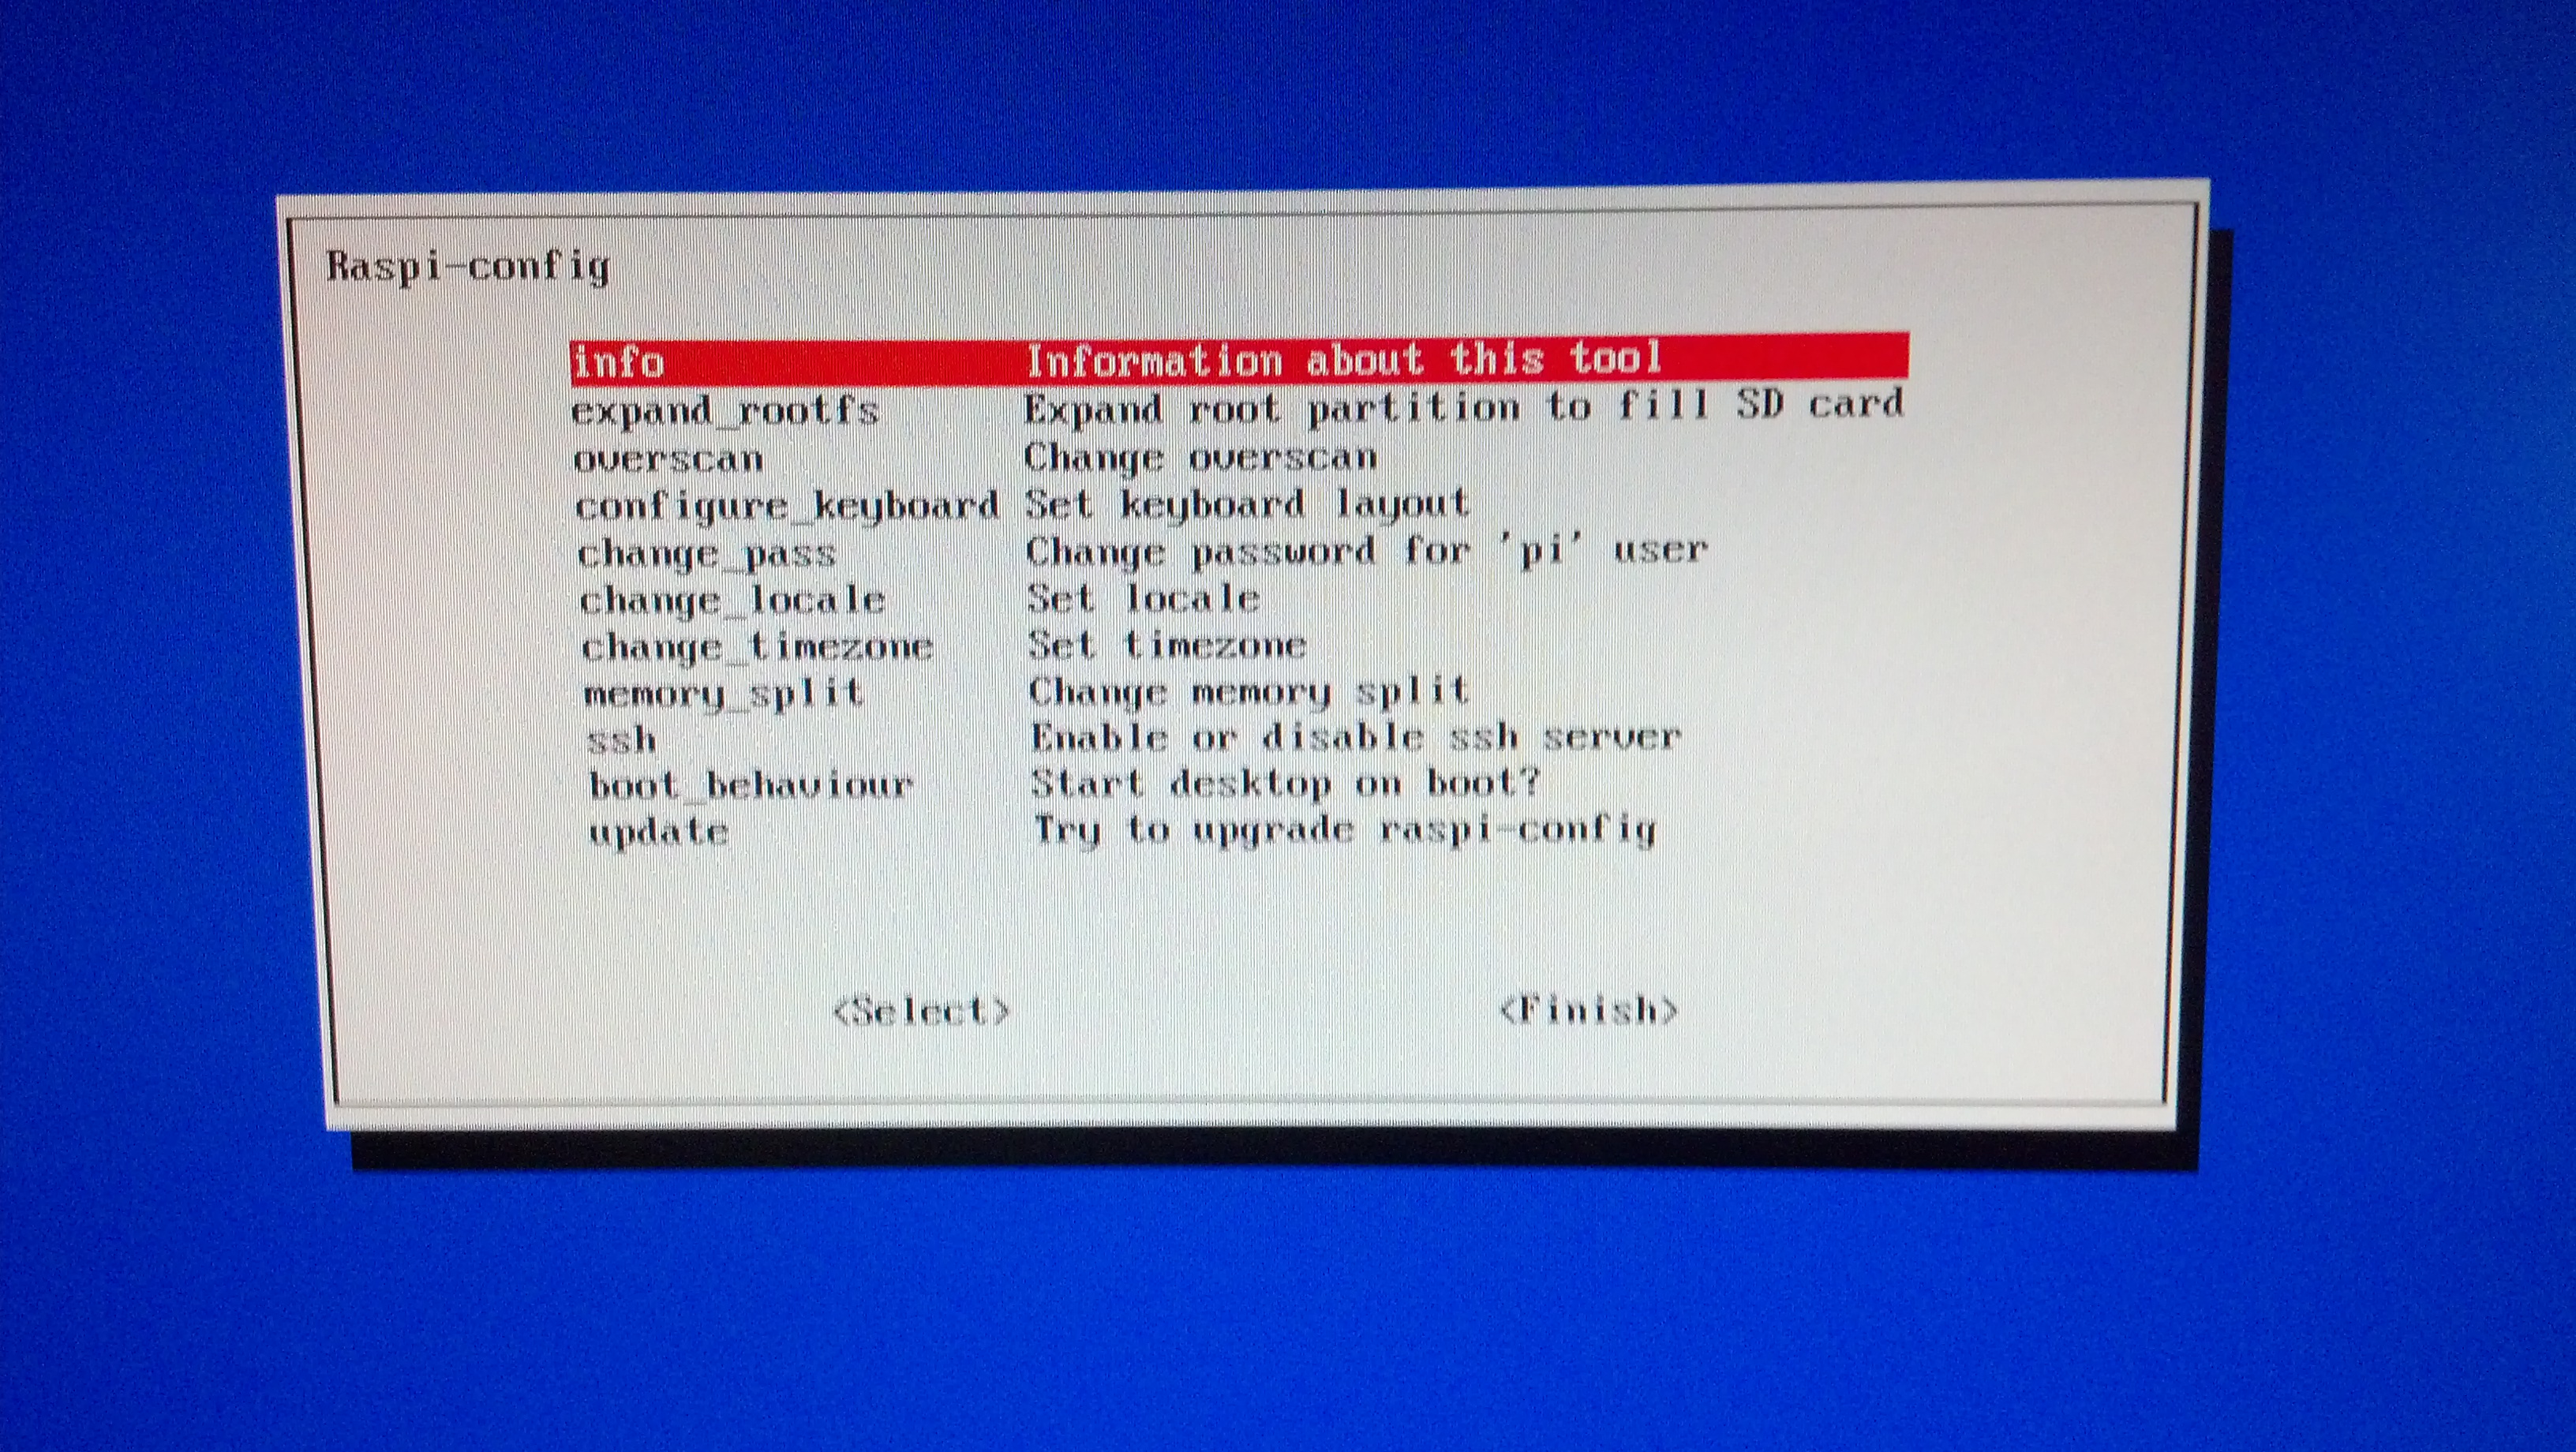
raspi-config
Setting up the new install was simply a matter of copying files back to their original locations, and reinstalling libjpeg8-dev and lighttpd. As we are now moving from one armhf environment to another, I didn’t even need to recompile rt_http or mjpg_streamer – they simply worked once they were copied into place.
WiFi Upgrades
At this point I also took the opportunity to upgrade the tank’s WiFi capabilities. I replaced the tiny Edimax EW-7811UN adapter with an Edimax EW-7711UAN, which has a large aerial that should improve coverage. It uses the rt2800usb driver, which is supported out of the box on Raspbian and Occidentalis.
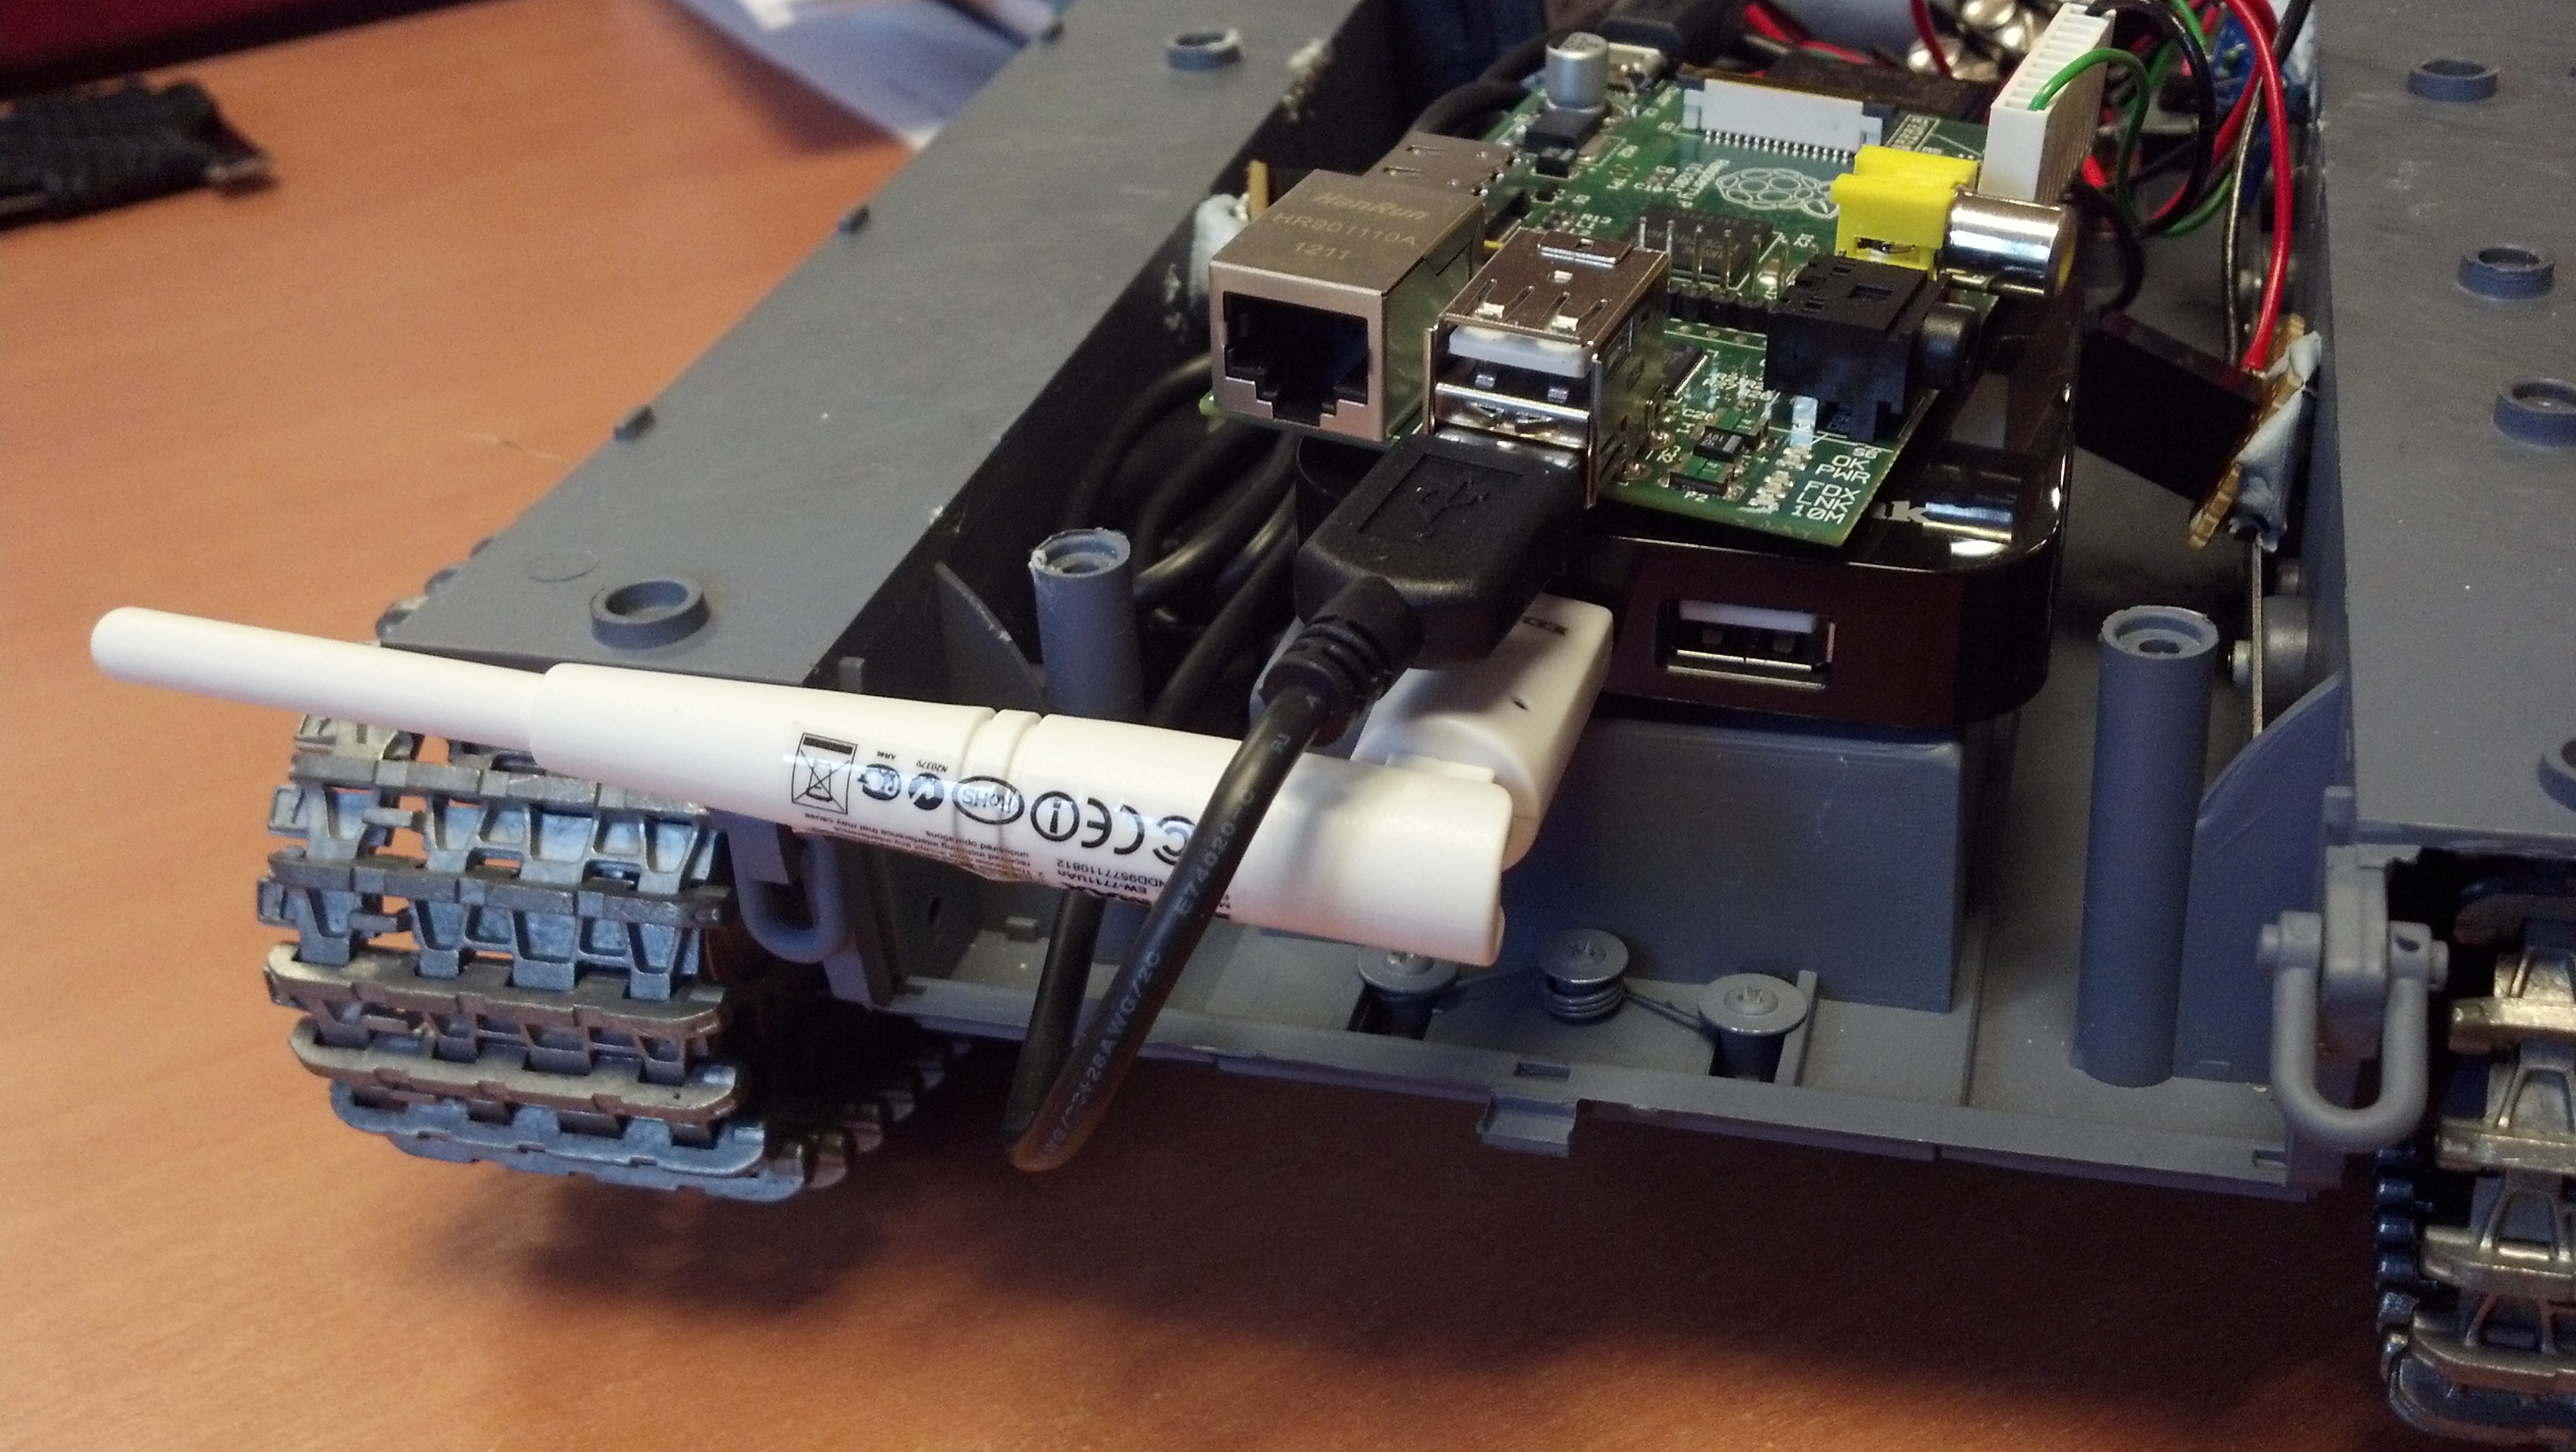
Rear of Lower Chassis, showing new WiFi Adapter
I also suggested on day 17 that I would like the Raspberry Tank to be its own WiFi access point, rather than having to create a hotspot with the control device and have the tank connect to that. Whilst configuring networking on the new Occidentalis install, I figured that it would be a good time to set that up.
Configuring the Access Point
To set the Raspberry Pi up as its own access point, we first need a package called hostapd which will manage the broadcast of the SSID and will allow other clients to connect. For convenience, we also need a DHCP server that will allow connecting clients to automatically be given an IP address. One of the easiest DHCP servers to configure is the one built into dnsmasq, so that’s what we used.
Setup went roughly along the lines of this Raspberry Pi Access Point guide.
I deviated a little from the guide in that I chose to run the Raspberry Tank’s WiFi network in the 192.168.0.0/24 range, and chose to run an open WiFi network instead of a WPA-protected one to ensure compatibility with the widest range of devices.
My eventual configuration was as follows:
/etc/defaults/hostapd
DAEMON_CONF="/etc/hostapd/hostapd.conf"
/etc/hostapd/hostapd.conf
interface=wlan0
driver=nl80211
ssid=RaspberryTank
hw_mode=g
channel=8
beacon_int=100
auth_algs=3
wmm_enabled=1
/etc/dnsmasq.conf
interface=wlan0
no-hosts
dhcp-range=192.168.0.50,192.168.0.150,12h
/etc/network/interfaces
auto lo
iface lo inet loopback

iface eth0 inet dhcp

allow-hotplug wlan0
iface wlan0 inet static
address 192.168.0.1
netmask 255.255.0.0
gateway 192.168.0.1
With these files set up as above, and both hostapd and dnsmasq restarted, my laptop could see and connect to the tank’s wireless network. However, I did encounter one odd problem with this configuration, which was that the laptop was not being given an IP address by dnsmasq’s DHCP server.
Running tail /var/log/syslog revealed messages of the form:
DHCP request received on wlan0 which has no address
Even though wlan0 had an address set in /etc/network/interfaces, that address was no longer assigned to the interface after hostapd bound to it. Running sudo ifconfig wlan0 192.168.0.1 reassigned the right IP address to wlan0, at which point the laptop could then connect and be given a proper IP address.
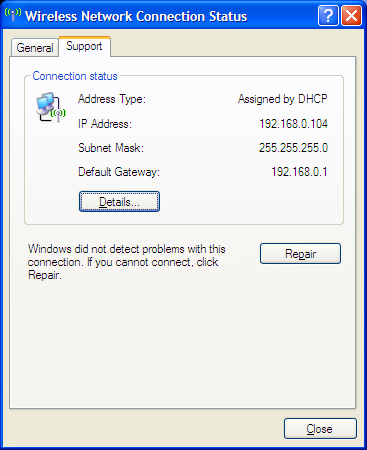
Laptop Connected to WiFi Network
This was a repeatable issue, however – even on boot, wlan0 would be given its IP address, but as soon as hostapd ran, that address would be removed, causing the DHCP server to fail. I could not find anything useful on the internet about this issue. (It seems that this may not be a problem when using hostapd to bridge between two connections, and that is how most people use it.)
I “fixed” the problem with the ugly hack of editing the init script for hostapd, and inserting the command ifconfig wlan0 192.168.0.1 such that it runs after the hostapd daemon.
My /etc/init.d/hostapd file now reads:
#!/bin/sh

### BEGIN INIT INFO
# Provides:		hostapd
# Required-Start:	$remote_fs
# Required-Stop:	$remote_fs
# Should-Start:		$network
# Should-Stop:
# Default-Start:	2 3 4 5
# Default-Stop:		0 1 6
# Short-Description:	Advanced IEEE 802.11 management daemon
# Description:		Userspace IEEE 802.11 AP and IEEE 802.1X/WPA/WPA2/EAP
#			Authenticator
### END INIT INFO

PATH=/sbin:/bin:/usr/sbin:/usr/bin
DAEMON_SBIN=/usr/sbin/hostapd
DAEMON_DEFS=/etc/default/hostapd
DAEMON_CONF=
NAME=hostapd
DESC="advanced IEEE 802.11 management"
PIDFILE=/var/run/hostapd.pid

[ -x "$DAEMON_SBIN" ] || exit 0
[ -s "$DAEMON_DEFS" ] && . /etc/default/hostapd
[ -n "$DAEMON_CONF" ] || exit 0

DAEMON_OPTS="-B -P $PIDFILE $DAEMON_OPTS $DAEMON_CONF"

. /lib/lsb/init-functions

case "$1" in
  start)
	log_daemon_msg "Starting $DESC" "$NAME"
	start-stop-daemon --start --oknodo --quiet --exec "$DAEMON_SBIN" \
		--pidfile "$PIDFILE" -- $DAEMON_OPTS >/dev/null
	log_end_msg "$?"
        ifconfig wlan0 192.168.0.1
	;;
  stop)
	log_daemon_msg "Stopping $DESC" "$NAME"
	start-stop-daemon --stop --oknodo --quiet --exec "$DAEMON_SBIN" \
		--pidfile "$PIDFILE"
	log_end_msg "$?"
	;;
  reload)
  	log_daemon_msg "Reloading $DESC" "$NAME"
	start-stop-daemon --stop --signal HUP --exec "$DAEMON_SBIN" \
		--pidfile "$PIDFILE"
	log_end_msg "$?"
	;;
  restart|force-reload)
  	$0 stop
	sleep 8
	$0 start
	;;
  status)
	status_of_proc "$DAEMON_SBIN" "$NAME"
	exit $?
	;;
  *)
	N=/etc/init.d/$NAME
	echo "Usage: $N {start|stop|restart|force-reload|reload|status}" >&2
	exit 1
	;;
esac

exit 0
This works, but is a very ugly hack, so I welcome any comments teaching me how to do this properly!
However, at the end of day 22, we do now have a Raspberry Tank that functions properly as its own WiFi access point, including a DHCP server.
Comments