I have a couple of Raspberry Pi computers sitting around, and given the recent situation I figured I ought to at least use one for something. I thought I would have a go at some kind of passive information display, and discovered these ultra-widescreen displays which look pretty cool.
At the same time, I’ve been noticing a few limitations in my usual weather app at this changeable time of year. For example, when a daily forecast says “lows of 0°C”, should I expect the frosty night to be the previous one or the following one? And with “90% chance of rain”, is that all day, or just starting at 10pm when I don’t really care? When trying to protect frost-intolerant plants, or just get the laundry dry, not knowing is quite annoying.
Bringing these together, I remembered the concept of a Meteogram—probably the nerdiest way to represent a weather forecast, but a handy method of visualisation that meets my needs and brings both hardware and software sides of this project together.
For once I’ve decided to do some software development first rather than rushing out to buy hardware that then lies abandoned in a drawer for months, so I’m starting by putting together a script to generate my meteogram. There are online providers of Meteogram images with a lot of customisability, but I thought I would have a go at doing it myself. I’ve decided to use Python for this, since I’ve not used it for a while—my recent projects having been largely C, Java and JavaScript—and I’m playing around with the plotly library.
You can see the source code here.
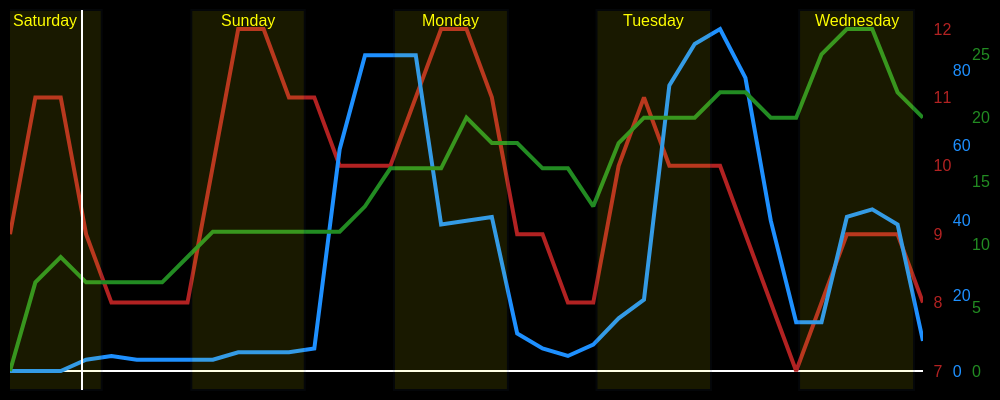 A Meteogram image showing temperature, precipitation and wind speed for five days
My current plan is to output the Meteogram as a static image, and use a utility such as feh to render it on the screen. This very basic approach should mean it can be run without issues on an original Raspberry Pi B, of which I have several lying around, rather than needing my spare Pi 4 which would probably be required for a more interactive display.
Once I reach the point of buying and setting up the hardware for the project, I’ll add this as a “proper” page on the site, but for now I’ll just update the blog if I make any major changes to how the project is planned to work.
Add a Comment