The Billy Bass Sat Nav / Bluetooth Bass build guide includes prototyping and design steps, plus builds on the previous Big Mouth Phatt Bass project, so it could be a bit confusing to follow. If you just want to skip to the end and build the finished product for yourself, this is what to do. I strongly recommend you read all of this page and understand what’s involved before buying parts. If you get stuck, shoot me an email and I will see if I can help!
- Buy everything on the Bill of Materials. This includes a 15th Anniversary Edition Billy Bass, three small PCB-based components, and some connectors. You’ll also need to get a custom motherboard PCB manufactured using these PCB Gerber Files. Companies like JLC PCB and PCBway will do this cheaply provided you don’t mind a shipping delay.
- Ensure you also have a small cross-head screwdriver, a multimeter, a soldering iron, solder, and some electrical tape. If you haven’t soldered before, I recommend getting some perfboard and some bits of wire to practice with in advance. A “helping hands” type device with clips and a magnifier may be helpful. For experienced solderers, there’s nothing tricky here—it’s all through-hole.
-
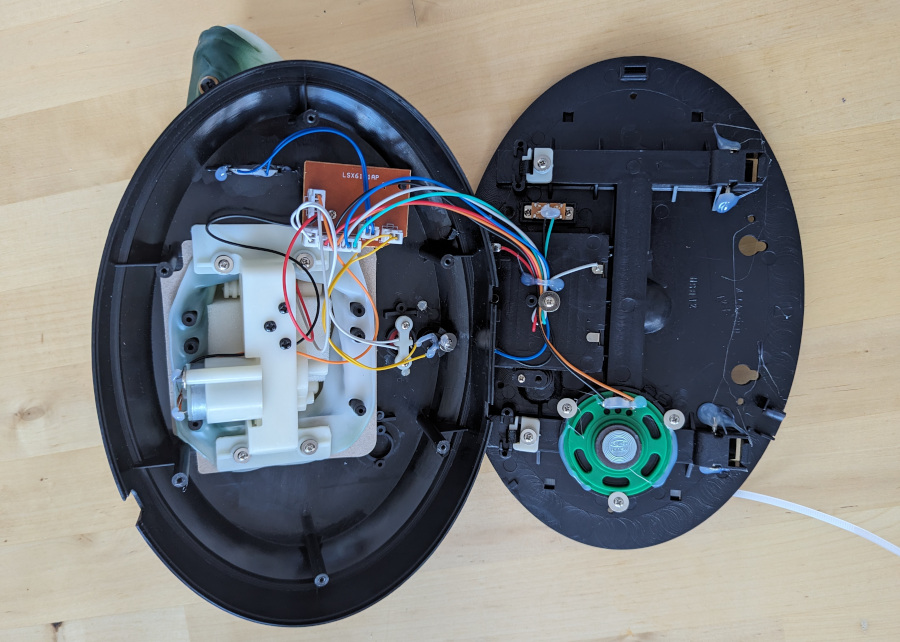
Disassemble your Billy Bass and remove the original control board. If you’ve bought the right one, this should be fully connectorised, so an easy job, but do unplug the connectors carefully.
-
While your ESP32 Devkit almost certainly came with pins attached, your motor driver and audio amplifier board may not have done, and therefore need the headers they came with soldering on. The audio amp is designed to output to a small screw terminal block on the top of the device; to fit into the motherboard PCB you should not fit this part, and instead solder on two normal PCB header pins, the same as used for the seven pins on the other side of the board. Note that the pitch spacing is different though, so you will need to use two individual pins cut from the extra strip you ordered.
-
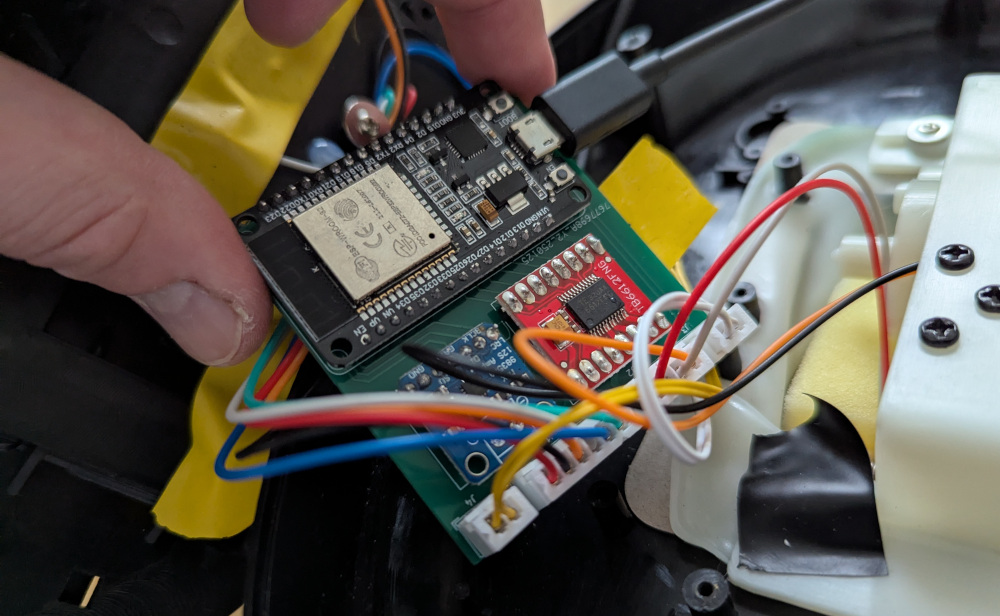
Next, solder the new components to the replacement motherboard. The arrangement should be as per the photo below. Take extra care to make sure the JST connectors are the right way around; all notches should be on the side away from the edge.
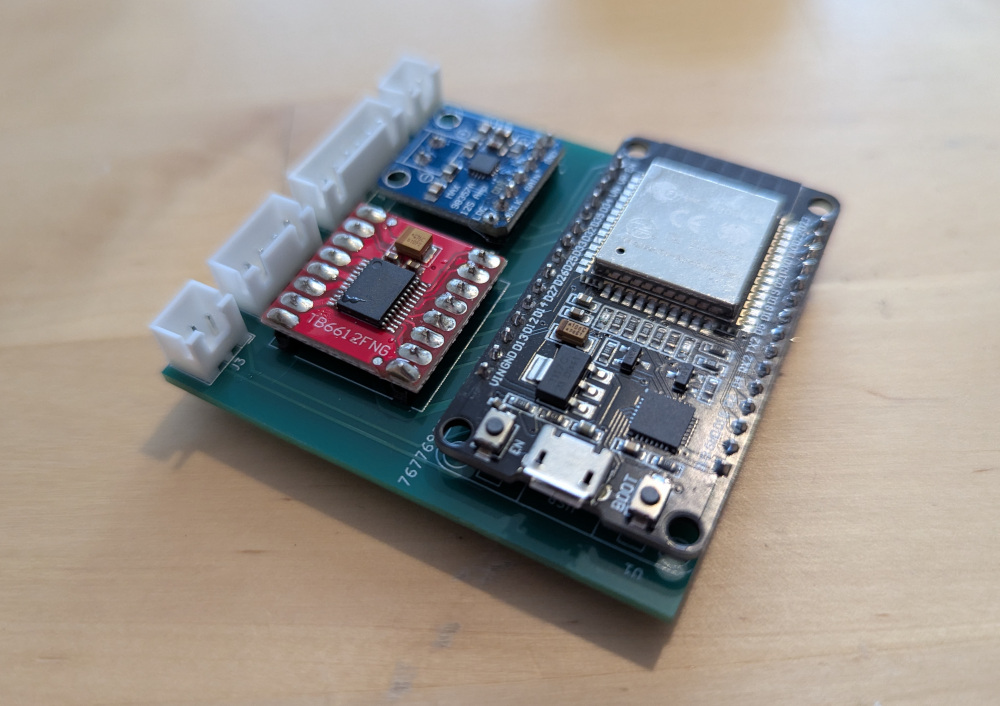
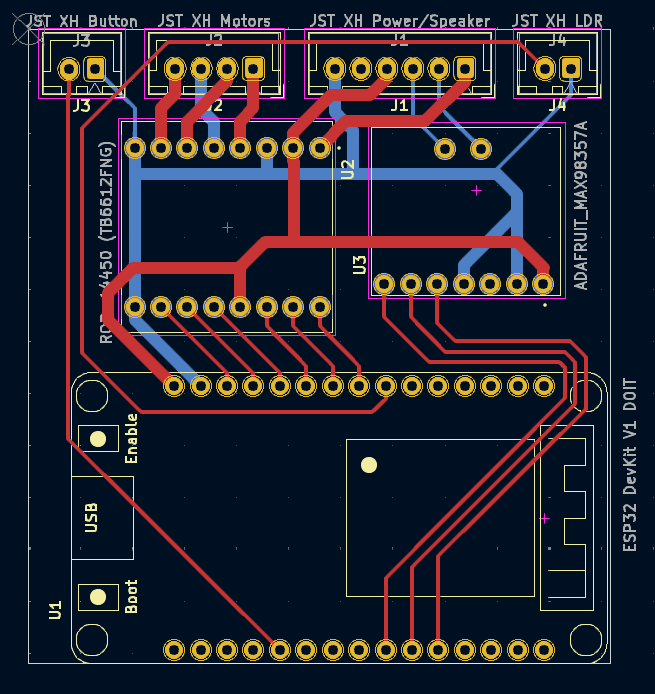
You only need to solder the pins that connect to something—this is almost all of the pins on the motor driver board, audio amplifier and JST connectors, but the ESP32 Devkit pins are only about half utilised, so you can save some time. Use the PCB drawing for a reference, this is top down:
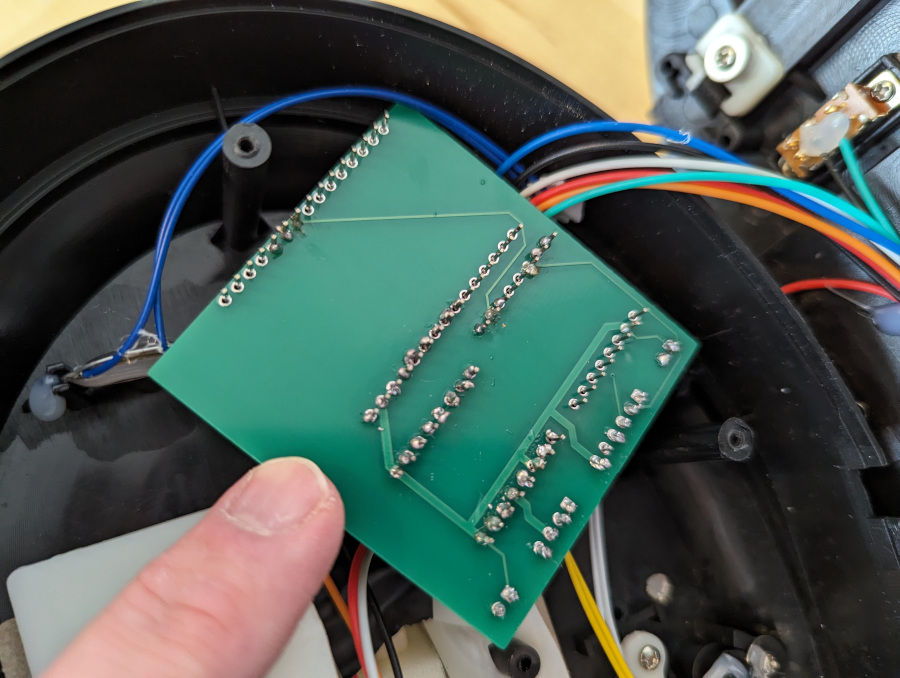
And this is how it will look when you’re soldering to the bottom:
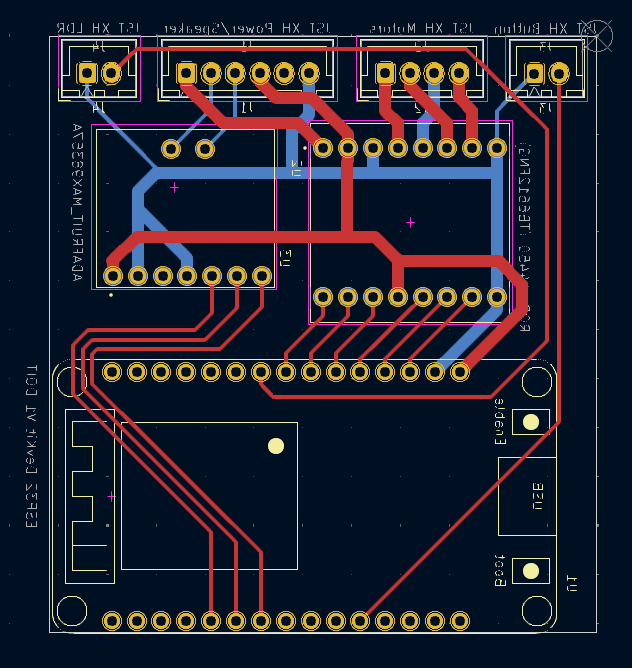
- Once you have finished soldering, use a multimeter in continuity mode to buzz through from pin to pin and check the solder joints are good. For example, the GND pin on the ESP32 Devkit should be connected to the left-most pin of the 6-pin connector, and so on.
-
Connect the four required JST connectors from the fish into your board. Looking top-down, the button goes in the left 2-pin connector, and the LDR goes in the right one. (The code doesn’t actually use these, but they can be connected for future development.) The 4-pin and 6-pin connectors should be obvious. The piezo buzzer isn’t used by this project, and can be left disconnected.
- On a computer, install Python, VS Code and the Platform.io plugin.
- Clone or download the Bluetooth Bass ESP32 Source Code from the repository, and open it in Platform.io. The appropriate ESP32 library should be installed automatically.
-
Connect the computer to the ESP32 Devkit, and upload the program using Platform.io. There are guides online to help you with this. You will probably need to select which device represents the ESP32; for me it was
/dev/ttyUSB1but yours may be different, or e.g.COM1,COM2etc. on Windows. (If you get stuck writing to the device on Linux, you may need to add yourself to a group that can access serial devices, e.g.sudo useradd -aG dialout $USERfor Debian & derivatives, orsudo useradd -aG uucp $USERfor Arch & derivatives.)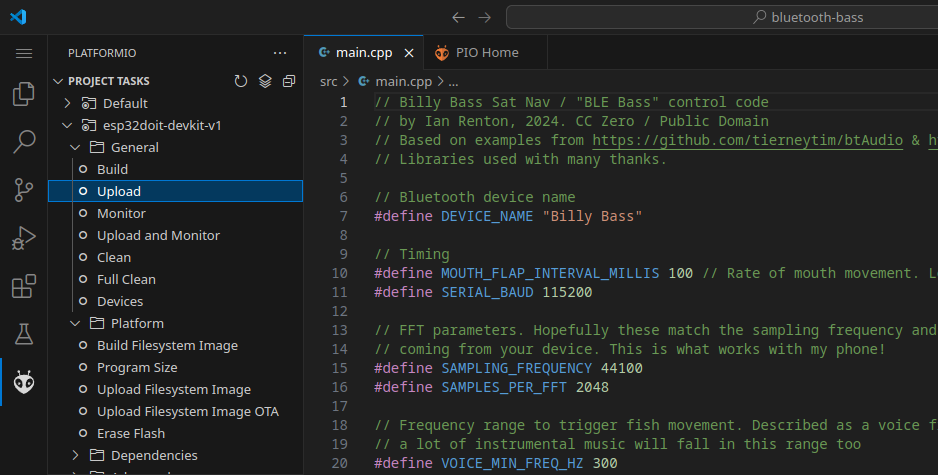
- Once the upload is complete, the ESP32 will restart. You can now test it. Grab your phone and connect to the new Bluetooth device called “Billy Bass”. Hold the front of the fish securely, then play some audio from your phone, either music or using the voice assistant for example. You should hear the audio and see the fish move! If not, check your wiring and code—and let me know if you’re stuck.
-
Finally, you should be able to put the fish back together. The PCB will need to go at an angle and you may want to use some electrical tape to ensure the board doesn’t touch any metal components inside the fish.
You can then screw the rear of the fish back on, and you’re done! When powered on, it will appear as a Bluetooth audio device. Simply connect to it from your phone, and your audio will come through the fish speaker along with flapping and singing action!
Note that if you have issues where you lose Bluetooth connection as soon as motors start moving, it could be a supply voltage issue, which probably means you just need to replace the batteries. There are some other possible solutions if you have this issue a lot—see the page “A Note on Board Restarts” from the Phatt Bass project, which is equally applicable here.
Comments