RTL-SDR
To set up the RTL-SDR, I followed the instructions on their Quick Start Page (about half-way down for the Linux instructions).
They were to download, build and install the RTL-SDR drivers:
sudo apt-get install libusb-1.0-0-dev git cmake pkg-config
git clone https://github.com/rtlsdrblog/rtl-sdr-blog
cd rtl-sdr/
mkdir build
cd build
cmake ../ -DINSTALL_UDEV_RULES=ON
make
sudo make install
sudo cp ../rtl-sdr.rules /etc/udev/rules.d/
sudo ldconfig
Then blacklist the “standard” DVB drivers for the dongle, allowing the RTL-SDR drivers to be used instead:
echo 'blacklist dvb_usb_rtl28xxu' | sudo tee --append /etc/modprobe.d/blacklist-dvb_usb_rtl28xxu.conf
And then reboot.
Running rtl_test then results in a good initialisation of the device. (The “lost at least 124 bytes” message occurs only once on startup and not subsequently, so no bytes are being lost in an ongoing way.)
ian@planesailingportable:~ $ rtl_test
Found 1 device(s):
  0:  Realtek, RTL2838UHIDIR, SN: 00000001

Using device 0: Generic RTL2832U OEM
Found Rafael Micro R820T tuner
Supported gain values (29): 0.0 0.9 1.4 2.7 3.7 7.7 8.7 12.5 14.4 15.7 16.6 19.7 20.7 22.9 25.4 28.0 29.7 32.8 33.8 36.4 37.2 38.6 40.2 42.1 43.4 43.9 44.5 48.0 49.6
Enabled direct sampling mode, input 2
Sampling at 2048000 S/s.

Info: This tool will continuously read from the device, and report if
samples get lost. If you observe no further output, everything is fine.

Reading samples in async mode...
lost at least 124 bytes
rtl_tcp
The first application I set up on the device was rtl_tcp. This is not doing any ADS-B/AIS/APRS tracking by itself, but fulfills the requirement for the “fourth mode” I wanted the device to function in, where it is usable as a generic network-connected SDR. This is useful both for testing the device, and for making it more generally useful for tinkering with.
It would have been nice to use SpyServer for this role, as it has more features than rtl_tcp, but unfortunately it is not compatible with the Pi Zero. I therefore proceeded with the simpler software.
Running it without arguments listens on port 1234, but only to local applications. To enable access from other computers on the network, I ran it with:
rtl_tcp -a 0.0.0.0
Another PC on the network can then connect to it on this port. I used SDRSharp, selected the “RTL-TCP” source and configured it with the correct IP address and port. Though this provided a connection and streamed data, I found that I had to enable “Tuner AGC” after making a connection before anything useful came through. This is likely a limitation of rtl_tcp.
A standard simple test is to listen in to Radio 1:
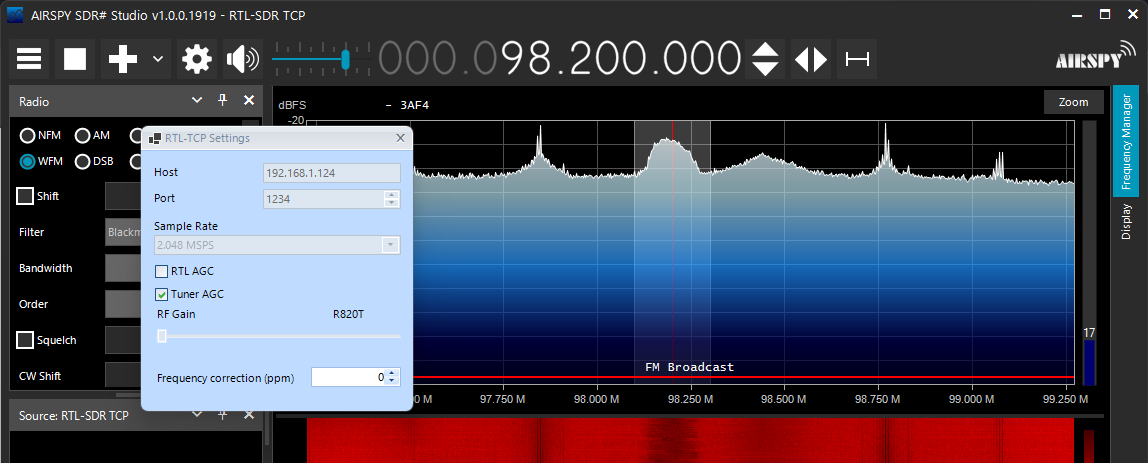 SDRSharp screenshot showing RTL-TCP settings and Radio 1 streaming in the background
The Killers were immediately playing out of my PC speakers—so at the very least we have an extremely over-engineered FM broadcast radio receiver working! I was mildly concerned about the high noise floor though—it remained to be seen how badly this would impact packet decoding.
I created a systemd service to allow rtl_tcp to run in the background. I created a file at /etc/systemd/system/rtl_tcp.service with the following content:
[Unit]
Description=rtl_tcp
After=network.target
StartLimitIntervalSec=0

[Service]
ExecStart=rtl_tcp -a 0.0.0.0
StandardOutput=inherit
StandardError=inherit
Restart=always
RestartSec=10

[Install]
WantedBy=multi-user.target
I then ran sudo systemctl daemon-reload to update and sudo systemctl start rtl_tcp to start it in the background. Reconnecting using SDRSharp worked as expected. I avoided sudo systemctl enable rtl_tcp (which would make it run on startup) at this stage, as we will later sort out scripts to stop and start rtl_tcp along with the other applications.
Finally, I used sudo systemctl stop rtl_tcp to stop the service before I started setting up AIS-Catcher.
AIS-Catcher
AIS-Catcher was built from source using the same method as in the main Plane/Sailing system AIS setup guide:
sudo apt install git make gcc g++ cmake pkg-config libcurl4-openssl-dev zlib1g-dev
cd
git clone https://github.com/jvde-github/AIS-catcher.git
cd AIS-catcher
mkdir build
cd build
cmake ..
make
sudo make install
Then tested using:
/usr/local/bin/AIS-catcher -d:0 -gr RTLAGC on TUNER auto -a 192K
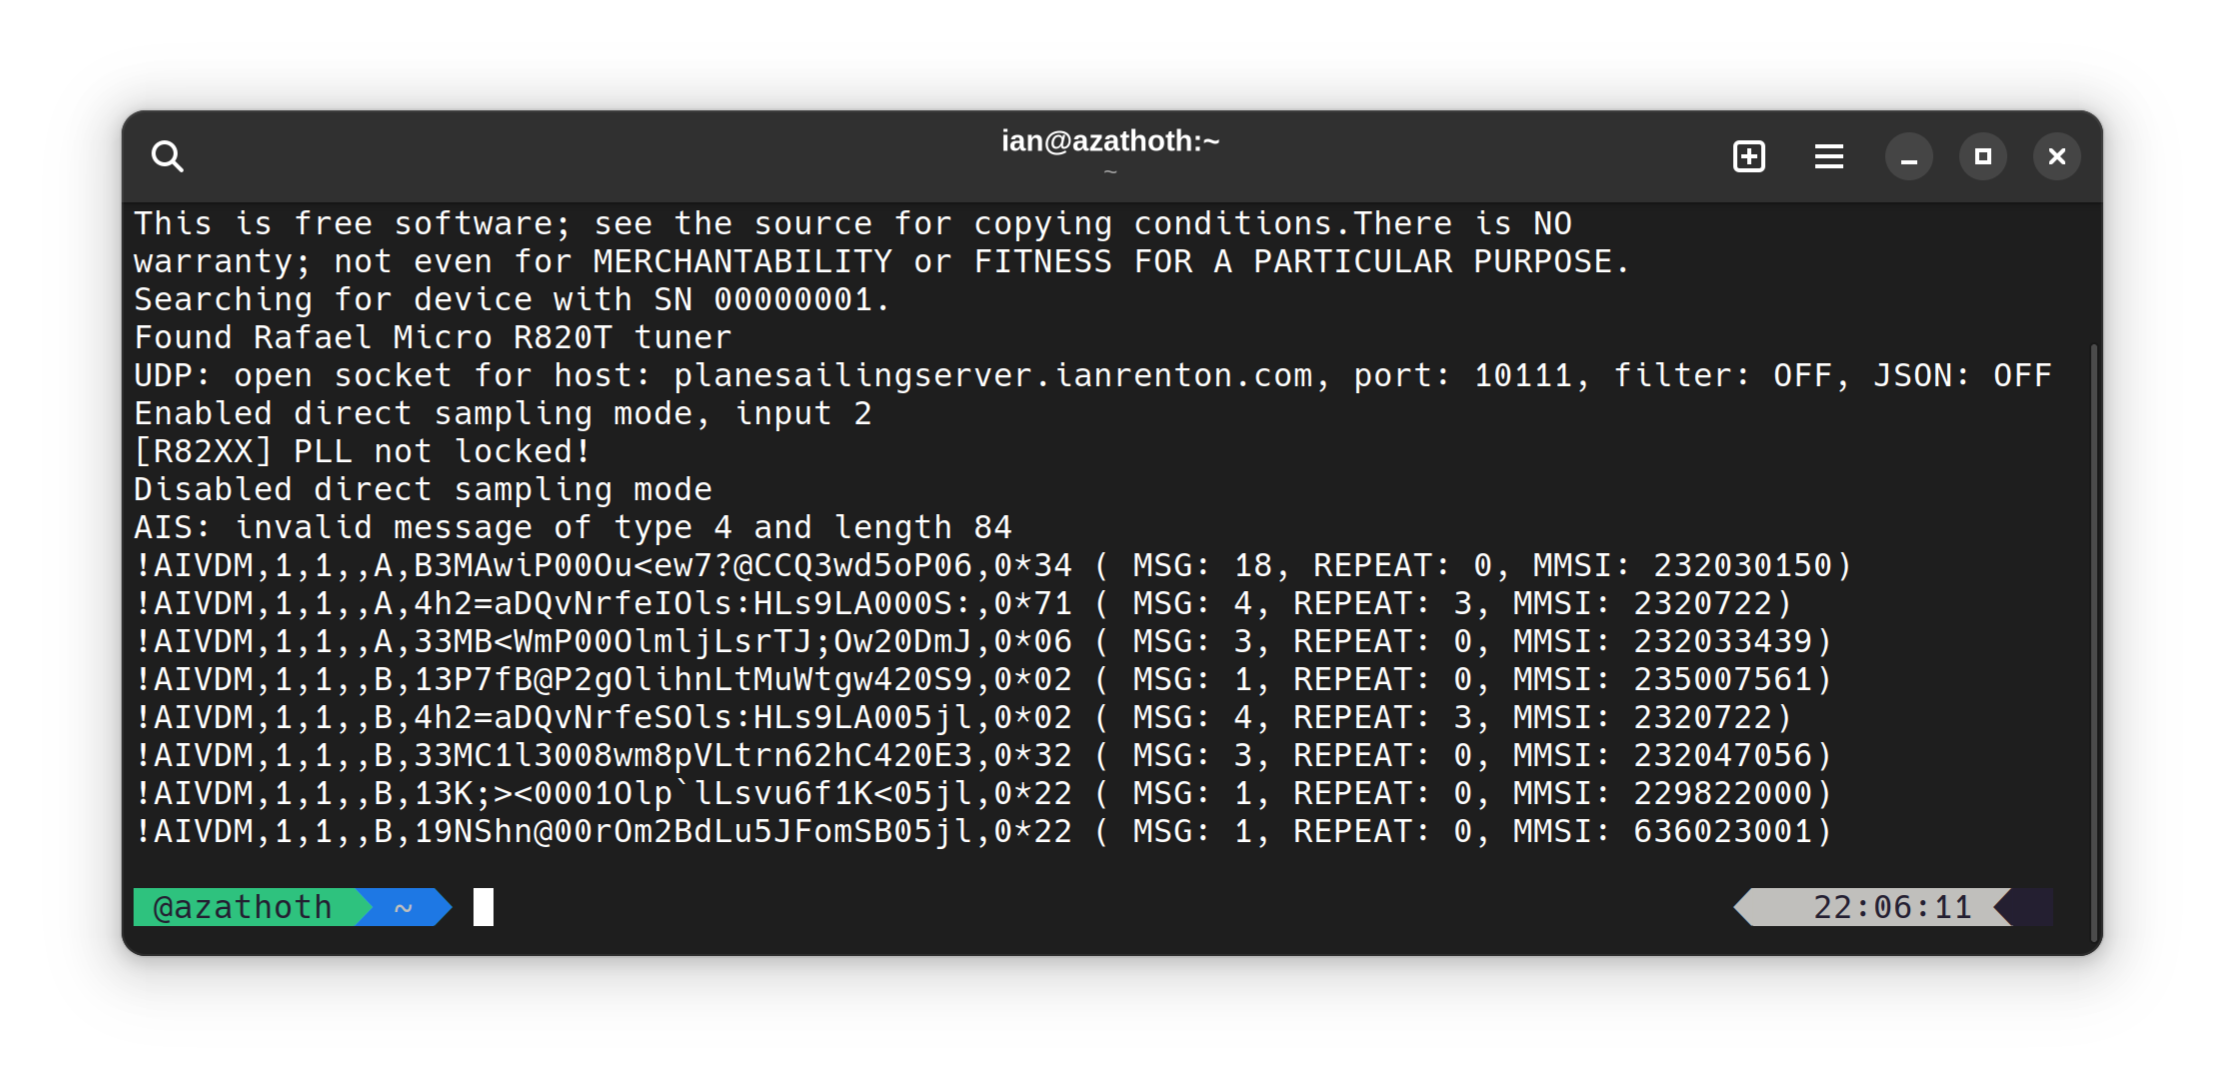
This worked well for a while, but eventually started printing “RTLSDR: buffer overrun” warnings. The AIS-Catcher README suggests that the -F flag for fast downsampling may be needed on the Pi Zero, and there some additional suggestions in this thread which I used as well. My eventual choice of command-line to minimise issues was:
/usr/local/bin/AIS-catcher -d:0 -gr RTLAGC on TUNER auto BUFFER_COUNT 12 -a 192K -s 288K
This omits the -F flag—in my experimentation, supplying -F resulted in about 20% CPU load on the Pi Zero, whereas without it used about 30%. In this system, when in “AIS mode”, the Pi will not need to be running anything else apart from AIS-Catcher, I decided to omit the flag for better decode performance. The -s 288K and BUFFER_COUNT 12 additions definitely seemed to help reduce the “buffer overrun” messages though. AIS data modulation is 9600 baud GMSK so 288kS/s sample rate should still be plenty.
Once proven working, I created a systemd service at /etc/systemd/system/ais-catcher.service including adding an output that will send the data to Plane/Sailing:
[Unit]
Description=ais_catcher
Wants=network-online.target
After=network.target network-online.target
StartLimitIntervalSec=0

[Service]
ExecStart=/usr/local/bin/AIS-catcher -d:0 -gr RTLAGC on TUNER auto BUFFER_COUNT 12 -a 192K -s 288K -F -u planesailingserver.ianrenton.com 10111
StandardOutput=inherit
StandardError=inherit
Restart=always
RestartSec=10

[Install]
WantedBy=multi-user.target
This is slightly modified from the version on the Plane/Sailing server, because the server has hard-wired ethernet and can guarantee it’s online at the point the service starts up. Here, I have added a dependency on network-online.target to ensure that AIS-Catcher doesn’t start up before the Pi has found a WiFi network to connect to, because if it does it will fail domain name resolution of planesailingserver.ianrenton.com and shut down.
The example above also only sends data to Plane/Sailing server; it can of course be extended with other -u arguments to send data to MarineTraffic and other online services.
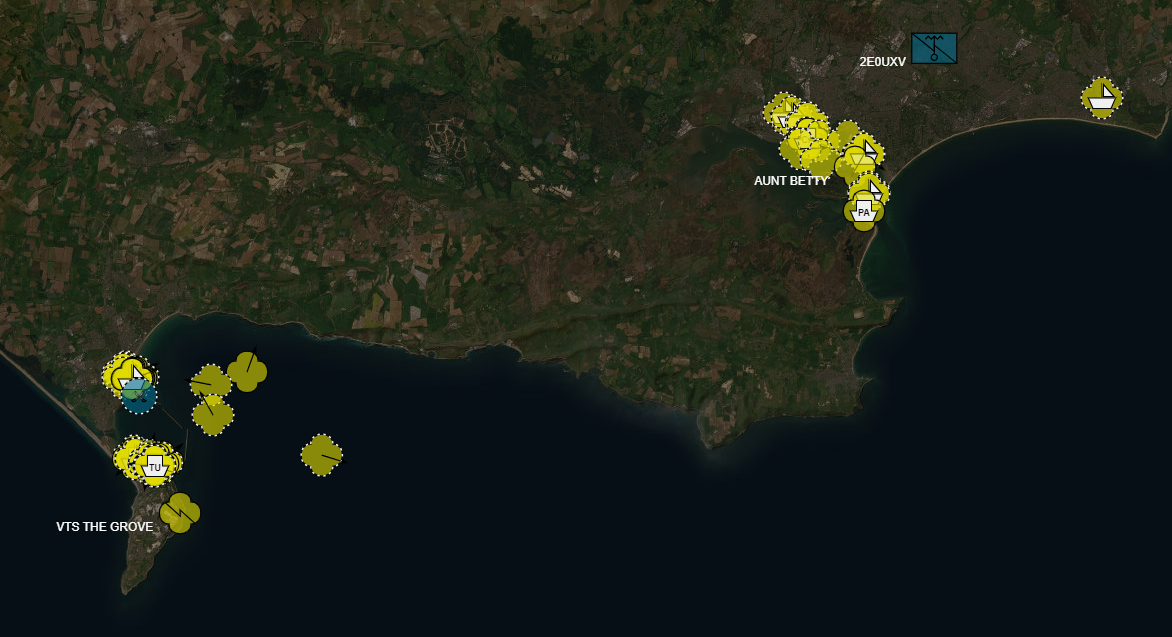 Plane/Sailing Portable providing AIS coverage in the Weymouth area, while the main system covers Poole to the Solent
I then used sudo systemctl daemon-reload to update and sudo systemctl start ais-catcher to start it to ensure the service works. I avoided sudo systemctl enable ais-catcher (which would make it run on startup) at this stage, as we will later sort out scripts to stop and start AIS-Catcher along with the other applications.
Finally, I used sudo systemctl stop ais-catcher to stop the service before I started setting up Dump1090.
Dump1090
Dump1090 was installed from FlightAware’s Raspberry Pi repository as described on the the main Plane/Sailing system ADS-B setup guide:
wget https://uk.flightaware.com/adsb/piaware/files/packages/pool/piaware/f/flightaware-apt-repository/flightaware-apt-repository_1.2_all.deb
sudo dpkg -i flightaware-apt-repository_1.2_all.deb
sudo apt update
sudo apt install dump1090-fa
On install, Dump1090 starts its own service—and lighttpd—so the PiAware web interface will immediately be available on port 8080 from a web browser.
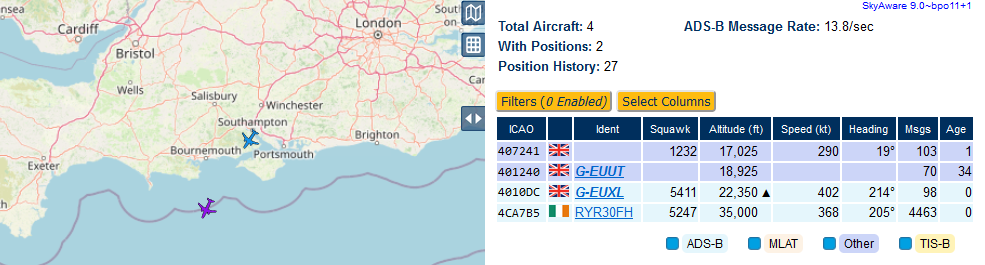 An untuned antenna, indoors at ground level is not the ideal set of conditions for tracking a lot of planes.
Once set up, feeder software such as PiAware can also be set up in order to send the data to flight tracking websites as well as Plane/Sailing. These applications typically include an interactive setup on install that prompts you for the location of the receiver to enable MLAT. For a portable system, unless it is intended to only ever remain in one place (or unless a GPS receiver is fitted - see later), the location should not be set. If it’s set and the system is moved, it will mess up MLAT calculations in the local area.
Feeders for FlightAware, FlightRadar24 and OARC were set up in order to test the system, following the linked instructions. These software for these feeders will run all the time on the device; we don’t particularly care about turning them on and off as without dump1090-fa running they won’t be doing much anyway.
You may notice the above instructions get the received data to common tracking websites, but not to Plane/Sailing—this step is covered later under “Integration with Plane/Sailing”.
As usual, we want to manage which services run on this device manually. Because Dump1090 has added and enabled its services automatically, we now want to disable them, and stop them before continuing with the guide:
sudo systemctl disable dump1090-fa
sudo systemctl disable lighttpd
sudo systemctl stop dump1090-fa
sudo systemctl stop lighttpd
Direwolf
Direwold was installed from the operating system repositories as described on the the main Plane/Sailing system APRS setup guide:
sudo apt install direwolf
sudo usermod -G plugdev pi
Then creating a config file at /home/pi/direwolf.conf with the following contents, replacing the values in square brackets:
ACHANNELS 1
ADEVICE - null
ARATE 24000
CHANNEL 0
MODEM 1200
KISSPORT 8001
MYCALL [call]-[ssid]
IGLOGIN [call] [passcode]
IGSERVER [region].aprs2.net
IGTXLIMIT 6 10
The TBEACON command could be used in future in this config if a GPS receiver is attached.
To test, the following command was run:
rtl_fm -d 0 -M fm -f 144.80M -o 4 -g 34 -s 24000 - | direwolf -t 0 -a 10
Output was then observed to see lines like the following—97 is a reasonable value for audio level.
ADEVICE0: Sample rate approx. 24.2 k, 0 errors, receive audio level CH0 97
If you have APRS transmitters that you can receive, you will hopefully see some APRS decodes here—I wasn’t able to during initial testing.
As with the main Plane/Sailing server, I created a direwolf.sh file in the home directory to run the software:
#!/bin/bash
rtl_fm -d 0 -M fm -f 144.80M -o 4 -g 34 -s 24000 - | direwolf -t 0
I then made it executable with chmod +x ~/direwolf.sh and created a systemd service file at /etc/systemd/system/direwolf.service:
[Unit]
Description=rtl_fm and direwolf
After=network.target

[Service]
ExecStart=/home/pi/direwolf.sh
WorkingDirectory=/home/pi
StandardOutput=inherit
StandardError=inherit
Restart=always
User=pi

[Install]
WantedBy=multi-user.target
You may notice the above instructions get the received data iGated to standard APRS servers, but not to Plane/Sailing—this step is covered later under “Integration with Plane/Sailing”.
I then used sudo systemctl daemon-reload to update and sudo systemctl start direwolf to start it to ensure the service works. I avoided sudo systemctl enable direwolf (which would make it run on startup) at this stage, as we will later sort out scripts to stop and start Direwolf along with the other applications.
Finally, I used sudo systemctl stop direwolf to stop the service before I started setting up the management scripts.
Add a Comment