Hardware Build
To test the concept, I first put together an initial prototype of the hardware. The Pi Zero, Zero4U USB hub and RTL-SDR dongle arrived relatively quickly compared to the AliExpress USB connector and perspex case parts, so I initially put them together using a chunkier USB adapter, cardboard spacer and cable tie.
I did consider removing the case of the RTL-SDR to reduce the size of the unit slightly, however I couldn’t find much information about this online, and given concerns about heat and electromagnetic interference, I decided to leave the case attached.
 The first prototype, with chunky USB connector, cardboard spacer and cable ties
Once the rest of the parts arrived, the build could be improved somewhat with a smaller USB adapter and the perspex “case” parts providing extra rigidity.
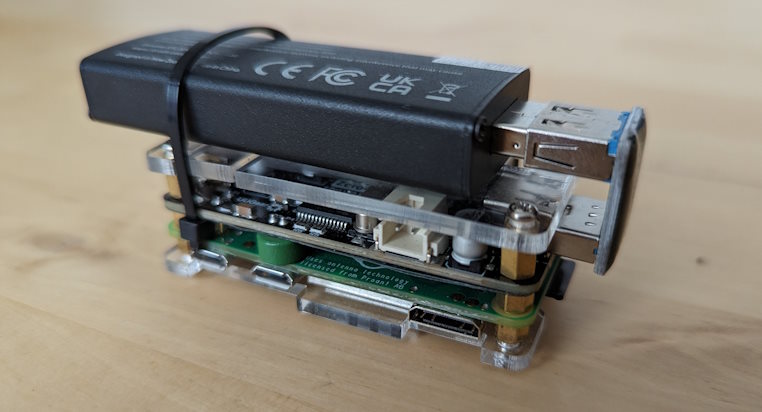 The second prototype, improving the neatness of the unit
Raspberry Pi OS Setup
Raspberry Pi OS Imager was used to create the SD card, using what at time of writing is called “Raspberry Pi OS (Legacy) Lite”. This is the Debian Bullseye 32-bit version, the only one currently compatible with the Pi Zero, and the “lite” version so as not to include a desktop environment.
The tool now offers a way to customise things like the WiFi credentials and enable SSH right from the GUI, which is nice:
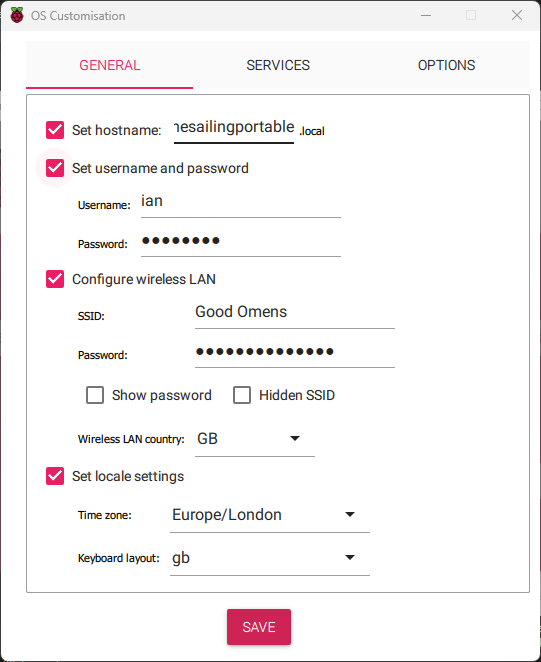 Customisation options in Raspberry Pi OS Imager
Setting up the WiFi once for my home network is fine, but what about when moving to a new location? Luckily, there is a way around this—though not an ideal one, as it involves editing a file on the SD card every time. By creating a file at /boot/wpa_supplicant.conf on the Pi, we can get it to copy the settings in it to its internal config on startup. (When the SD card is accessed from a Windows PC, /boot is the only visible partition, so it’s just dropping a wpa_supplicant.conf file in there.)
Unfortunately the Pi deletes the source file when it internalises it, so it can’t be simply updated next time. I therefore created a wpa_supplicant_template.conf file to use later, with the following contents:
country=gb
update_config=1
ctrl_interface=/var/run/wpa_supplicant
network={
   scan_ssid=1
   ssid="XXX"
   psk="XXX"
}
network={
   scan_ssid=1
   ssid="XXX"
   psk="XXX"
}
(Where “XXX” are real credentials for networks I will connect the device to.) Any time I want to move the device to a new network, I can put the SD card in a computer, edit the file to include a new network block, then copy that file to wpa_supplicant.conf, put the SD card back in the Pi and power on.
In future I aim to try this script which should set the Pi up as a WiFi access point if it can’t find any of its preconfigured networks. This will allow adding new network credentials without needing an SD card reader.
On first login to the Pi via SSH, I updated the package repository info and installed packages, as is good practice, with sudo apt update && sudo apt upgrade.
Add a Comment